Slide Catalogs, Indices, and Labels II

Time for another exciting bit of truly important tedium! -K

Part Two; Catalog and Index
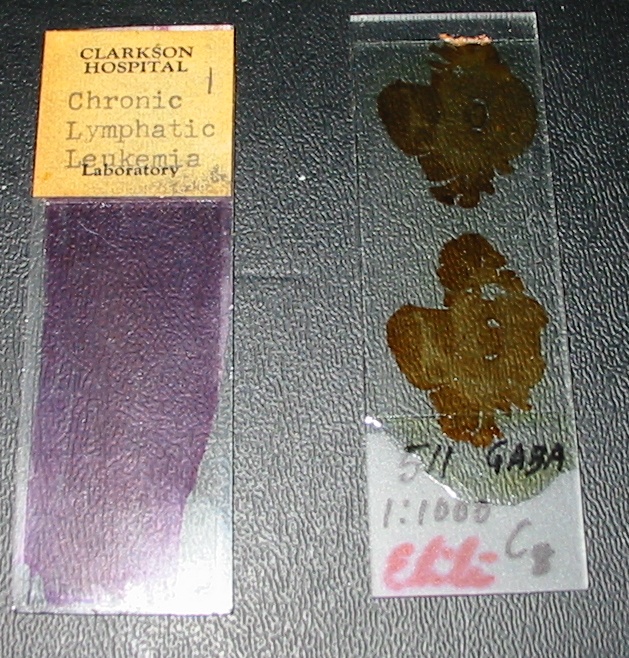
From the previous post it should be clear that the form of label can vary wildly as can the information on it. Its hardly possible to fit all of the useful information one might have concerning a specimen, or its treatment, on a slides labels. Logically the thing to do is place the more extensive information in a secondary location where it is both accessible and organized: a catalog or database of some kind is warranted.

The information kept may be standardized across an entire collection or it may vary and be tailored to each slide depending on what is relevant or known. The decision on whether to maintain a constant or variable set of information is as much a mater of preference as the choice of what to include on the slides label. Information may be spartan and limited only to that which not obvious, or robust in the extreme filling an entire sheet of paper.

This raises an other question, the choice of medium on which to compose the catalog. One can compose the catalog on traditional media such as looseleaf paper kept in a binder, or a series of index cards in a file. The variety of digital options is quite extensive, specialized software will prove popular with some while a simple spreadsheet or web based database might be preferable for some hobbyists. For particularly large or complex collections a digital catalog can prove expedient if for no other reason than its being rapidly searchable and previous entries are more easily updated or expanded. A hard copy catalog of printed forms filled in by hand with ink is often simpler to use in practice.

Papers recommending the form which a slide catalog can take and the information one should include date to the nineteenth century and may be found in any number of texts. Guides on the subject are not infrequently written for slides produced for a particular study or by a specific laboratory; what is required of a catalog for one series of slides may differ substantially from an other. Few recommendations exist concerning the catalog kept by an amateur and such a catalog faces all the challenges of a curators catalog and more.

Specimens may be of enormously different sorts and of massively divergent ages. The knowledge the cataloger posses of each slide may be likewise variable. If one relies on a catalog where the information recored is constant regardless of slide, there is a substantial risk that many fields will necessarily be left black for slides which are purchased as opposed to slides which are prepared by ones self or vice versa. One may side step such a pitfall by using only broad information in ones catalog and providing a section where particular notes unique to each slide may be entered.

An index of some sort if useful simply for providing ready access to the information of a desired slide, or type of slide. With a digital catalog a traditional index is largely superfluous as the rapid searching provided by the software used should negate the need for a formal index. For a paper catalog one may organize the index around a handful of useful information, such as the specimens name, or the type of preparation. It is a simple manner to adapt a printed address book and make entries alphabetically which correspond to numbers in the catalog proper or pages of the catalog. One may also use the index to locate slides if entries within it point to the location where the slide is stored. If at first such an index seems more labor than it is worth when a substantial number of slides are had it will prove useful, particularly for the aid of collections that are used by others than the curator.

Whatever manner of catalog is kept, in whatever form, it is undeniably of great utility particularly when one begins preparing or collecting permanent mounts. If one simply tucks slides into cases as they are acquired it will become all to easy to lose track of a delightful preparation just when it is most needed. A catalog serves to fix a means of organization as much as a method of retaining information that will not fit upon a slides label. I have no wish or standing to set a best program for the creation of a slide catalog but as with labels I will attempt some broad standards that will help inspire one who wishes to compose a useful catalog.

  • Each entry should bear a number that corresponds to an indelible mark on the slide to which it corresponds.
  • Each entry should inform upon the location of the slide in storage, i.e. Box A, Slot 1 etc.
  • Each entry should inform upon the provenance of the slide.
  • Each entry should identify the preparation by the name that is marked on the label of the slide to which it corresponds.
  • Each entry should include both the common name of the specimen and its scientific name if known.
  • Each entry should identify the source of the specimen; point of collection if known, limited to type if unknown i.e. whole mount, transverse section, smear etc.
  • Each entry should describe in general terms the process used in preparation if known.
  • Each entry should include the mountant used.
  • Each entry should include the date of mounting if known, the date of acquisition is unknown.
  • Each entry should inform as to the gauge of coverslip used.
  • Each entry should include a section for notes of interest not provided for elsewhere in the catalog.

Next post will be about mounting a specimen or two, I promise!

Slide Catalogs, Indices, and Labels

When building up a collection of slides it’s not uncommon for the collector to simply put them up in a case without a thought to organization or logging. It’s too bad considering the tools available to keeping track of things. Labels are an old tool but still of value. -K

Part One; Labels

I’m old enough to remember with apprehension the advent of digital catalog systems. I remember when looking for “that article about you know, the new study” in a journal whos name wasn’t remembered meant hoping the librarian knew your field at best, and wading through a cross index compiled by some other librarian at some other library and hoping a name seemed familiar at worst. Digital cataloging and inexpensive terminals changed all that. It became possible to dispense with a wall of tiny drawers and an army of clerks pounding away at typewriters loaded with cream colored cards. Keeping records became faster with the digital revolution, at least as far as looking things up went.

Putting records into the system, whatever system, is still time consuming. In place of typewriters there are keyboards and in place of cards there are fields on a database program. Of course keeping records can be faster now but it still requires some time and thought. What has any of this to do with microscopy? Slides of course. The cataloging used in libraries is rather similar to that needed for keeping slides organized so it’s only fitting that the two might be compared. Books however, have a bit of a leg up on the average microscope slide; there are pages within a book dedicated to identifying it. Slides have their labels, ideally, but often they are nearly useless for the sake of brevity.

Image

Oh AmScope what horror is next?

The record keeping associated with the utility of a microscope slide is often overlooked. It’s tragic that the modern supply houses putting out their cookie-cutter slides, however well made and nicely stained, tend to put next to nothing on their labels. The nearest thing to a catalog is usually a printed card with only the name of the specimen and maybe a number corresponding to a slot in the case. One can see an example of this sort of modern prepared collection above. It is simple, mass produced, dubious in quality (notice specimen 2, Coprimus? because of course they can’t expect an underpaid technician to know that Coprinus is a genus and Coprimus is gibberish) but inexpensive and readily available.

When purchasing antique slides the collectors knowledge of the mounter or the uniqueness of the specimen, even the artistry of the preparation makes up for the usual absence of any extra notes. It’s noteworthy though to consider the differences in the labels on a modern slide and one of significant age. Below are two slides, each from a recognizable firm but of significantly different age. The primary market of each company varied as well. The more contemporary company markets almost entirely to young students and their teachers, the older served professionals, and amateur enthusiasts of every age.

Image

One of these things…

On the more modern slide the information provided is rather limited to say the least. It is labeled “Bacteria Types w.m. Ba 020 Carolina Biological Supply Company”. Certainly knowing it is a slide of whole mount (w.m.) bacteria would permit one to look in the right text for identification but there is plenty of space on the label so it wouldn’t have been impossible to put the type of bacteria on the slide itself. Knowing the company and seeing their own catalog reference (Ba 020) would make it a bit easier to track down more information about the specimen but not knowing a date and considering the recent changes at Carolina finding out anything further about the slide will be difficult. As an example of different bacteria types the slide is useful, but as a representative specimen it is quite useless without a good deal of effort.

The older slide is from W. Watson & Sons and also has rather limited information on it’s labels. However, the quality of that information is entirely more useful because the mounter knew the intended use of the slide. The slide is a test slide, made of a known object under rather exacting conditions so that it may be used to test the quality of a particular objective. One can see that the specimen is of Pleurosigma angulatum and that it is mounted in Styrax. Knowing the mountant is necessary for test objects (or any specimen) because without it (or more specifically the refractive index of it) one can not measure the thickness of the specimen accurately. Electron microscopy has largely eliminated the arguments concerning the actually form of a spring-tails scale but an objectives ability to resolve one is a classic measure of quality.

Image

…is not like the other.

Above one can see two more slides, of an entirely different sort than the previous two. On the left is a blood smear from a Hematology laboratory while on the right are two serial sections of primate brain from a research laboratory. One has a pasted on label which has a coating of balsam, while the other is marked in ink on its frosted end. One has only cryptic markings that are seemingly useless without a knowledge of the specimen and the logging practices of the lab, the other is clearly marked, immediately recognizable and identifiable without additional information. Neither has any information about the specimen preparation or treatment, neither has a date, neither informs on the mounter or the mountant.

On the slide to the right one can see that a printed label reading “Clarkson Hospital Laboratory” has had “Chronic Lymphatic Leukemia” typewritten on it. One may find that Clarkson Hospital is likely Bishop Clarkson Memorial Hospital once of 415 South 26th St. Omaha Nebraska which closed it’s doors and merged with University Hospital in 1997. From the appearance of the label and by virtue of digging into the history of Clarkson one could date the slide to the 1950’s without to much trouble. The characteristic color of the smear makes it rather simple to guess the stain employed and a hematology text of appropriate vintage might even provide information on the preparation method, but it would only be a guess. A textbook with color photomicrographs would likely replace the function of this slide in a modern hospital but as an example of the condition it depicts it is still useful.

The slide on the left reads only what looks like “511 GABA 1:1000 C8 Elilè”. Cryptic to say the least, but the specimen is clearly a section of brain. From its size and morphology one might easily guess it is of a small animal, likely a primate. Looking about for a connection between the markings on the label and primates one can find reference to gamma-Aminobutyric acid (GABA) receptors in the field of neurophysiology without too much effort. The first number is no doubt a catalog or subject reference, I can only guess at what the ratio might be in reference to but it’s not much of a leap to hypothesize that “C8” is a reference to order of the sections. Being in possession of a second slide labeled the same but for “C9” makes such a guess a near certainty. If I had a subscription to the Journal of Neurophysiology, and sufficient interest, I might be able to identify what the marking in red actually reads or likely indicates. An interesting slide, but even with a more comprehensive label it would remain little more than an interesting object of little utility outside the laboratory where it was produced.

It’s worth noting that the contents of a label change depending on the intended use of a slide as much as they do depending on the time period during which it was produced. Whatever information is placed upon a label is useful, but the use to which that information is put might vary wildly. When one prepares their own slides the only limit on the information on the label is what one imposes for ones self. In the various texts available all sorts of claims are made as to the necessary information a label must have. One can see from the above that this information has never become standardized, nor is it ever likely to become so. Labels then are almost exclusively in the realm of preference, yet permit a few exceedingly general suggestions:

  • One should provide a slide with a label the contents of which are useful to the mounter and the intended audience.
  • One should provide a slide with a label which will endure the conditions of use and storage.
  • One should put their name on each slide they prepare.
  • One should put the date of mounting on each slide.
  • One should include some method of referencing more extensive information than the space on the label permits.

Be sure to tune in next time for more exceedingly boring walls of text dealing only in a cursory way with microscopy!

The Enemy! And His Finest Atribute.

I’m something of a B&L enthusiast. The exact reason is manifold, but likely started with a proximity based loyalty and it being the brand of my first stand. Today something from a competitor. -K

The American Optical Corporation was once one of the leading optical firms in the United States, if not the world. Well, honestly they never got the sort of press enjoyed by Zeiss, B&L, or Lietz. If you haven’t heard of them no doubt you don’t collect microscopes, or you’re not in the US. Perhaps AO Spencer sounds more familiar? Spencer Buffalo? In any case one of their finest innovations was something they called the Micro-Glide Stage. A simple apparatus, well executed and versatile, it’s something a wonder that it never became more popular.

The concept is simple, incorporate a floating stage of large size and circular outline on an otherwise stationary stage. By virtue of a large central hole the upper stage may be moved around the optical axis without the tedious turning of milled heads required by mechanical stages, or the fine touch (which takes some time for the student to acquire) needed in manipulating slides directly. Having used such a stage one quickly becomes adept at orienting the desired portion of any specimen. Because the stage is moved, rather than the slide one has the added advantage of not worrying about an errant stage clip knocking a cover slip from a temporary mount while chasing an active organism about the field of view.

Image

Simplicity itself

As one can see in this illustration taken from a maintenance pamphlet published by American Optical, the stage is almost supernaturally simple. No doubt the company used the simplicity of the Micro-Glide Stage to its advantage. Such an apparatus is far less complex than the circular mechanical stages seen on research microscopes, and would have provided American Optical a bit of an edge in marketing their microscopes to schools (an important client for nearly all manufacturers).

The utility of a rotate-able stage is not something one often has to convince a microscopist of, and no attempt will be made here to do so. Only, it has always been practice for schools (from grammar to graduate) to utilize a rugged and uncomplicated sort of microscope; it has however, been a rare thing for them to offer students the chance to use a rotate-able stage. For that reason alone many who use microscopes, even for professional reasons, have never made use of microscope bearing a rotate-able stage and will not feel the acute discomfort of lacking one.

While the great biological and petrographic stands with their finely machined circular stages are beyond the reach of most enthusiasts, or at least past the financial tolerance of spouses and parents, one can usually find an American Optical stand featuring a Micro-Glide stage for sale surplus or second-hand in the range of fifty dollars. At the risk of sounding the salesmen, I’d recommend searching one out. Below see a simple students model One-Sixty I prefer for looking at algae, living diatoms, rotifera, and all the bustle and huff in a drop of water.

Image

Image

Image

A Book Review

One of the most significant problems in amateur microscopy today is the books; what is available to the microscopist is either quite advanced and targeted to the current or future professional, or lamentably rudimentary and intended for the casual youngster. I’m of the opinion that a sufficiently motivated child or an interested adult would profit greatly from a more advanced text than is usually offered… In any case here’s a modern book I quite like. -K

Guide to Microlife is a conveniently sized book by Kenneth G. Rainis and Bruce J. Russell. It’s not particularly imposing either within or without and I would wager dollars to donuts that most microscope owners, fancying themselves serious, would put it back after leafing through it at the booksellers.  It is lovely to leaf through however, and I expect a fair number would keep it in mind and suggest it to any of the children in their life who show an interest in microscopy that extends beyond sight and exclamation. I count that a mistake. Not because it would be of no use to a child, I expect it would be much used in no time at all, but because it’s accessible style leads it to be easily put aside by adults who would benefit enormously from it.

It’s not surprising that an adult might at first put this book aside as too simplistic. It was written to be simple, direct, and I’ll hazard unassuming, so as not to intimidate the budding explorer. In the beginning acknowledgements credit is given to a few folks at Wards Sci. (a local company I quite love!) specifically for their advice in making the book more accessible. That the very accessibility which makes the work so welcoming should turn off some who would otherwise benefit enormously is only one of the draw backs of the work. The other is its price; $40.00 (US) for a book of under 300 pages which is intended for the precocious child might seem a bit excessive. It’s certainly worth the price but I will confess to purchasing my copy second hand for far less.

It is my opinion that the only thing, second to a limited literature, keeping microscopy from gaining a far more significant following, or catching the enthusiasm of one peering through a lens, is the lack of a means of easily identifying the wonders seen. This book is a credit to the literature and invaluable as an aid to identification. Admittedly, as a book on microscopic life it’s far from comprehensive and as a guide to identification it can be, at times, quite general, but for less than a hundred dollars one would be hard pressed to find a book that could identify half as much a quarter as well.

In the book proper “microlife” is broken down into four general and obvious groups; monerans, microfungi, protists, and microanimals. If the last group is rather broad it can be excused, and very well I might add, for no other reason than utility. When looking through ones microscope one may encounter all manner of things, living, or otherwise; once it is established as living, a certain number of specimens become far more likely than other and of those micro-animals may be more varied than the other groupings. Having such a limited selection of groups, together with such quality illustrations and photomicrographs (I feel I might be remiss in mentioning just how good the images in the book are) one can easily establish if not the specific subject seen, then at least enough to determine where to look for more specificity. This is where I think the value of the book comes through, in identification.

Sure it has a few suggestions for experiments of the most rudimentary sort, more than enough ‘science fair bait’ as it were, but to know, or at least have an idea of the life one sees through the lens is no small thing. If more of the so called serious amateurs owned this book I’m sure one would see far less forum and message board posts begging for identification of common organisms. If in this book the areas in which different organisms are commonly found are given childish micro-habitat designations such as “Bed and Breakfast” it must absolutely be accepted for no other reason than its utility.

The chances are if one is in possession of this book, and one sees an unknown living thing upon a microscope slide, it will be identified. Perhaps it will not be narrowed down to genus and species in the course of the slim volumes 287 pages, but enough will be shown to point the way to a comprehensive tome. It is a fantastic book, profusely and wonderfully illustrated, anyone with a microscope and an interest extending beyond the petrographic, metallurgic, or narrow field which holds a particular interest would do well to own this book.

It’s a profusely illustrated book with some of the more descriptive and utilitarian micrographs and microphotographs which I have seen. In looking through the work one gets a genuine sense of the interest the authors hold for their subject. It is more than its utility, more than its simplicity, a welcoming book which encourages, above all else. For my own part, as one who has pursued microscopy for some time, I will say that the book is excellent and true to its intent; inspirational without being useless and simple without being juvenile, it provides a starting point for identification or an almanac of where to locate desired subjects. It really is a quality work and for all it’s basic content I can not say enough on it’s virtue for the advanced yet un-specialized student.

Below find appropriate links to it on AbeBooks and Amazon:

http://www.abebooks.com/servlet/SearchResults?kn=Rainis&tn=Guide+to+Microlife&x=66&y=17

http://www.amazon.com/Guide-Microlife-Science-Life-Environmental/dp/0531112667/ref=sr_1_1?ie=UTF8&qid=1391376894&sr=8-1&keywords=Guide+to+Microlife

The Not So Pure Driven Snow

I had now idea just how dirty snow was, even when it’s not yellow. -K

A few days back I mentioned gather snow in the quest for micrometeorites. I have looked a all manner of things collected from melted snow, regrettably no visitors from space. What I managed to find was primarily biological, various pollen, bits of bark and leaf, and spores of all sorts. A few of the samples had sat around for so long before I got to them that some very interesting fungus had cultured. I found one clear example of Pestalopezia and several unidentified Deuteromycetes and Zygomycetes. The closest thing I found to a micro-meteorite was a bit of soot that I suspect is attributable to the wood stove a the gentleman across the street.

It really was rather surprising the amount of material which I did find. None of the snow I collected appeared as anything other than fluffy white powder when I gathered it, and the detritus which settled out in the melt water was ample to say the least.

Freezing Cold and Falling Skies

The natural world is home to a seemingly limitless supply of interest for any microscope owner. Nature might not always supply what your looking for, but there is always something to look at. -K

Faced with a seasonably cold winter and a terrible lack of snowflakes suitable for microscopy, I spent the morning thinking about what I might get out and collect now that wouldn’t be available in a few months when the seasons change. Snow is the obvious perishable commodity, of interest are the things carried by it. In particular areas algae and even pollen will color the snow, much to the wonder of people like the late, mad, Charles Hoy Fort.

A peek out the window showed no colored snows in evidence, only driven white powder made up of tiny balls thanks to the wind and temperatures higher up in the atmosphere. Snow, like rain, has the habit of bringing down things from the heavens; rain drops form around a nucleus of minute particulate matter and carry it to Earth, as does snow. Soot from chimneys, dust, pollen and even pollution are some of the more mundane things that fall with snow (or rain), but there is another passenger that comes from much farther.

Micro-meteors bombard the planet constantly and fall to the ground on their own, or with rain and snow as micrometeorites. In warm weather one can collect water from a downspout and search for bits of extraterrestrial material with a rare earth magnet. Anything sticking to the magnet, of minute size, and bearing a characteristic appearance is a likely micro-meteor. With roofs and gutters the way they are one will only end up with what happened to strike the roof.

Snow affords a unique opportunity to take samples from wherever one would like. This afternoon I went out to the garden with a large plastic storage bag and a 1 liter beaker. I held the bag open and dragged it across an area of new fallen snow about one meter square going down 2 centimeters or so. I didn’t pack the snow down and ended up with a quite full 2.5 gallon zip-lock bag of snow. Choosing a similarly undisturbed area I proceeded to pack snow into the beaker.

Things have been meting for a while now and there appears to have been all manner of things hidden in that clean white snow. When everything has melted I’ll take a close look at just what was hidden away and try a little write up of what was found.

Acid, Safety, and Suppliers.

You can buy just about anything on the web these days; everything from acid to xylene is a mouse click or two from from website to doorbell. It’s harder to know what’s safe than it is to recognize the hazardous so permit me to give a little example. -K

The weather this winter has conspired with my professional obligations to prevent (so far) the collection and mounting of any snowflakes. I’ve kept busy with other things and a fair bit of reading; some of that reading involved methods in diatom mounting. As a result, I found myself extending my chemical supplies in preparation to include some acids I normally wouldn’t keep on hand. I ended up ordering a bottle of concentrated (31%) hydrochloric acid from a supplier I hadn’t dealt with in the past.

Everything was nicely packaged with appropriate hazard labels and an externally attached pocket housing the applicable MSDS. Very professional really and beyond compliance with applicable regulations. When I opened the package I was unpleasantly surprised to find that the bottle of acid had leaked (I’ll blame the thermal effects of sitting on my doorstep in freezing weather and a delivery man who doesn’t understand what a arrow is in this case) and that bag around the bottle held about 20ml of exuded acid and one very dissolved label. Wonderful.

I could have left the bag unopened until such time as I needed the acid, but that’s not good practice. Naturally in dealing with an unfamiliar chemical my first action was to go to my chemical atlas and verify the properties of the chemical with the information on the MSDS. That complete I got together my protective equipment. Gloves and goggles are a must for handling acid and most people would certainly know that, however, the type of gloves might not be so readily known. If I wore latex gloves I would suffer an acid burn in moments and nitrile gloves would only be worse (spontaneous oxidation). Thankfully I have a number of heavy PVC gloves and a rubber apron.

I might have gone a bit overboard but safety is important and never more-so than when dealing with the unfamiliar. I cleared a table in my work area set up a ring stand with a funnel and labeled a clean HDPE bottle. I then stoppered my chemical resistant plastic sink (the entire make up of the sink and it’s stopper is plastic which is important as there are a lot of things one wouldn’t want to put in a metal sink) and got my canister of soda ash from the shelf. Then I suited up with a chemical resistant lab coat, rubber apron, elbow length PVC coated canvas gloves, chemical respirator, goggles and let my wife know what I was doing. Communication is as big a part of safety as anything!

Most every acid can be safely put into a sanitary sewer once it has been neutralized and the MSDS will provide instructions for handling spills. Check with local ordinances before putting any chemicals down the drain and don’t do it if your not sure. Soda ash (sodium carbonate) is a vital safety precaution when working with acid and is among the least expensive methods of neutralizing acid that one can have. If you’re going to have any of the strong acids around, have a few pound of soda ash on hand too.

Well, I put on my exhaust fan (if I had a fume hood I’d have used it, but a fan and a window is better than nothing) and, working over the sink, I opened the bag; low and behold, fumes. It wasn’t unexpected but it’s never fun to see. I would have been fine without respirator or fan just because of the size of the room I was working in but again, safety. With the bag opened I liberally applied a scoop of soda ash and waited for the reaction (not much of one) to stop. One more scoop to absorb the liquid in the bag and the residue on the bottle and that’s that, the hard part is over.

I poured the acid from the bottle into the new container and capped it. Moving the funnel to the sink I put the soda ash mixture from the bag into the old bottle through the funnel to get the remaining residue. I slowly filled the sink with water and verified the neutrality of it with a pH tester before letting it run out. If that doesn’t sound fun then consider a different method of cleaning diatoms!

Divisible Objectives and my Favorite Stand

Things have come and gone in microscopy through the years. Some have been happily put aside as inconvenient when new advances were made and others have been quietly forgotten. I for one lament the passing of divisible objectives. -K

For a great many years it was considered abnormal and a genuine extravagance for a microscopist, even a professional, to be in possession of more than one stand. Optical apparatus was expensive, prohibitively so. Before continuing permit me to digress and provide an bit of example; consider that in the 1930 bound catalog of Bausch & Lomb an achromatic objective of 2x magnification was priced at $5.00, the equivalent of $71.10 dollars today. One could also have a 10x for $8.00 ($113.76). The full complement of dry achromatic objectives with magnification spanning 2x to 60x, some eight objectives in all, would have cost the princely sum of $86.00, $1222.93 in todays dollars according to the consumer price index, and been beyond the means of even the well-funded.

It’s easy to understand that for most microscopists it proved sensible economically to purchase a middle of the range 10x objective and use it with a comparatively inexpensive low power ocular when less magnification was required switching to a more powerful ocular as nessacary. In part because of the expense some things were done that would not be considered sound by the standards of today. One of those things, which no doubt seems somewhat blasphemous to todays workers, is the divisible objective. They turn up not infrequently on stands dating to what I think of as the “Black & Brass” era with rarer examples in the “Fully Brass” period preceding and becoming most common in the “Fully Black” period after the first world war. I can only hope for forgiveness regarding my rude designations of time but this is all very general.

A divisible objective is one in which the front and back optical components may be separated to obtain lower magnification. Bausch & Lomb produced these prolifically in the 16mm size so that with the front component in place 10x magnification was provided, while the rear portion only provided approximately 4x. By purchasing a divisible objective one was effectively provided a 16mm and 32mm objective in one unit. Most of the manufacturers provided divisible objectives of one sort or an other but the divisible 10x was certainly the most common from any source.

In 1925 Bausch & Lomb was granted a patent for a new system of constructing parfocal objectives that no doubt grew out of observations made while manipulating divisible objectives. The patent may however, have been an effort to cut down on competitors production of divisible objectives more than anything else, as the usual method of employing rings of varying thickness around the threads seems a great deal more convenient.

Image

For comparison

Above one may see a B&L 32mm objective, 40mm objective, and 32mm equivalent portion of a divisible 16mm objective. It’s worth noting the differing position of the optical components of the objectives and that any of these objectives will work usefully on a compound microscope. The stand seen below is a perfect example of the sort of microscope on which one could expect to find a divisible objective.

Image

No clips because I never incline my microscopes, it being my habit to work standing

The above is a Bausch & Lomb stand from the late 1940’s (easily dated by the double knurled heads). One can see the assembled 10x divisible objective in position and compare its outline with that of a non-divisible objective. This is in fact my favorite stand for micrography, photomicrography, measuring, and most general work, it shows every evidence of having been an economically prudent apparatus while not neglecting function.

This particular stand was assembled by Lukas Microscope Service of Skokie, Illinois. The company was founded in 1931 and is still in business today. They provided this microscope with a fixed, removable, 1.20 Numerical Aperture Abbe condenser with iris diaphragm and filter holder, the usual two sided mirror, and three objective turret. I keep a divisible 10x B&L, a 43x B&L, and a high dry 60x B&L in place on this stand and find few objectives more suitable for measuring the thickness of a mounted specimen than the 60x.

One final point concerning this lovely instrument, it is the most modern model I own which retains a draw tube. For any who are products of the modern age and have not had the pleasure I will say a draw tube can be unspeakably useful. Properly dispositioned it’s the work of a moment to compensate for an unexpectedly thick (or thin) cover glass, or increase or decrease magnification. Of course there are attendant sacrifices optically but I can’t count the times I’ve been able to better measure the size of a structure because I’m familiar with the workings of a draw tube for given combinations of objective and ocular.

General Program for Preparation of a Chitinous Specimen with Pressure

In the previous series I stretched a rather simple mounting technique out to a few thousand words. I did my best to make things clear and explain the why and how of things. It’s easy to understand that way, but it’s easier to follow along with brevity. Here’s the same information all in one page and about 500 words. Easy to print out and refer to as required.

1) Remove killed and fixed specimen from storage, clean superficially with a camel hair brush, and bring into distilled water if necessary (removing fixatives such as alcohol or formalin). Dry specimens do not need to be brought into distilled water.
2) Place superficially cleaned specimens into a 10-15% solution of caustic potash (Potassium Hydroxide) or caustic soda (Sodium Hydroxide) for macerating. Ensure sufficient of the macerating solution is present to remain at 10% concentration when the fluid diffused from the specimen(s) are added to it.
3) Retain specimen in solution for 12-72 hours, or until visual signs of internal organ decomposition. Alternatively, heat the specimen in solution for up to 30 minutes to accelerate the process, do not allow the vessel to “boil dry.”
4) Remove specimen from macerating solution and wash in several changes of distilled water.
5) Add 5 or more drops of acetic acid to specimen in distilled water, both to ensure complete removal of macerating solution and to further soften chitinous tissue. If required specimens may be stored in strong acetic acid until ready to continue.
6) Apply pressure to bulbous portions of the specimen with the butt of a camel hair brush or needle holder, working from the head and expressing liquefied internal organs through the anus. For small ants and thin bodied specimens this treatment is not required.
7) Lay specimen out in position desired for mounting on slip not suited for general mounting (slips with chips or imperfections may be used). Arrange all appendages as desired before continuing.
8) Place a second slip over the first applying pressure first at the head of the specimen, hold slips together closely and prevent slipping of one across the other.
9) Use clips or other convenient apparatus to bind slips tightly together.
10) Place bound slips into vessel of anhydrous alcohol (95% denatured if none better is available) and leave for not less than 1 hour to dehydrate and harden. Specimens may be left in alcohol until convenient to proceed.
11) Take bound slips from alcohol and hold close while removing clips holding them. Separate slips flooding with alcohol so that the specimen does not adhere.
12) Wash specimen into watch glass with alcohol and use a camel hair brush to remove any internal debris that adhere to the specimen.
13) Transfer specimen to clearer required by the final mounting medium to be used. Leave for as long as the particular clearer demands. 1-24 hours is the usual time.
14) Take specimen from clearer and allow excess to run off before placing onto clean slip for mounting.
15) Apply mountant to one side of a cleaned cover glass of appropriate size for the specimen and lower directly onto specimen.
16) Add mountant at edge of cover glass if insufficient mountant was used, clean exuded mountant from slide in the event of excess.
17) Affix temporary label to slide and put up for mountant to cure as required.

Just a Little Reminder

I almost forgot! It is of course a new year and time to renew ones membership in any of the microscopical societies one fancies. I strongly recommend membership in the Royal Microscopical Society. The RMS has a long, and storied history as well as a vibrant and inspirational present. It is an excellent resource for both professionals and amateur enthusiasts. The RMS is welcoming and an incredible resource, whatever ones background and occupation.

Before thinking that a professional society oriented around the microscope and all of its applications and technologies would be a waste of money for a casual enthusiast, one would do well to consider the benefits. There are a number, and they’re all outlined on the RMS website in a better format than I can give here. But I will make my little pitch nonetheless. While looking around their site why not check out some of the past articles in old editions of infocus, the societies popular magazine? I’d say that it alone justifies the price of membership and I look forward to every issue. In the most recent issue there’s a timely article on the basics of capturing photomicrographs of snowflakes, and a really exciting and inspirational look at the latest work of Professor Milton Wainwright who has identified biological entities in samples taken 27 kilometers up in the stratosphere, not the sort of place one expects to find a fragment of diatom!

One other exceptional benefit of membership that I really have to mention is the discount provided to members for purchases at wiley. I recently made use of the discount to pick up the new edition of Current Protocols Select: Imagaing and Microscopy at an excellent price. The 2013 edition has been expanded and updated to the point that I was no longer content to run to the library when I needed to consult it and the RMS discount enabled me to get a copy of my own for a price that didn’t have my long suffering wife locking up my wallet.

Alright, enough of being a shill, but if you’re at all interested in really putting your microscope to use or even just seeing what others are able to do with theirs, consider membership in the RMS or one of the other outstanding microscopical societies.