Large Format Photomicrography part: IV

The earlier posts of this series have covered everything up to making the exposure, and took a bit of a detour to outline a method for performing the work with an improvised camera. At this point one is expected to have a focusing screen, a loaded 4×5 film holder, and an attachment or integrated camera compatible with the same. Two additional items that will prove helpful but are not strictly necessary are a simple hand-lens (a linen tester or tripod magnifier is ideal), and a photographic light meter. I understand that there are smartphone apps that can serve as a light meter, but I have no recommendations on that front. The remainder of this installment will take the form of a checklist.

  1. Place the focusing screen on the bellows of the integrated or attachment camera.
  2. Properly align the illumination source, the brightest available is ideal but depending on the ideal color temperature for the film non-standard sources may be preferable to those used for normal visual work.
  3. Place a specimen on the stage either in the object holder of a mechanical stage or beneath the stage clips (even if neither are usually employed).
  4. Where available make use of voltage control or dimmer to moderate the lighting to a comfortable level for visual work. Neutral density filters may be employed where the lamp may not be otherwise moderated.
  5. Obtain clear visual focus at the ocular.
  6. Where required (as in the photomicrographic BalPlan head) divert the light path from the ocular into the path of the attachment or integrated camera.
  7. Remove any neutral density filters in use or turn up the dimmer to provide the color temperature dictated by the film.
  8. Where available set the shutter speed to “T” and activate the release to illuminate the cameras light path. If “T” is not present but “B” is employ a locking shutter release.
  9. Where available (as in the Integrated Camera System II) focus the image projected on the ground glass using the control on the camera body. If the image will not focus (as is likely if using an improvised camera) one will need to adjust the length of the draw-tube or camera bellows to achieve focus. Do not focus the image on the screen by operating the focusing mechanism of the microscope-doing so will exaggerate any optical defects present.
  10. Use a hand lens to view the image seen in a clear area of the focusing screen to achieve fine focus without the interference of the grain of the focusing screen.
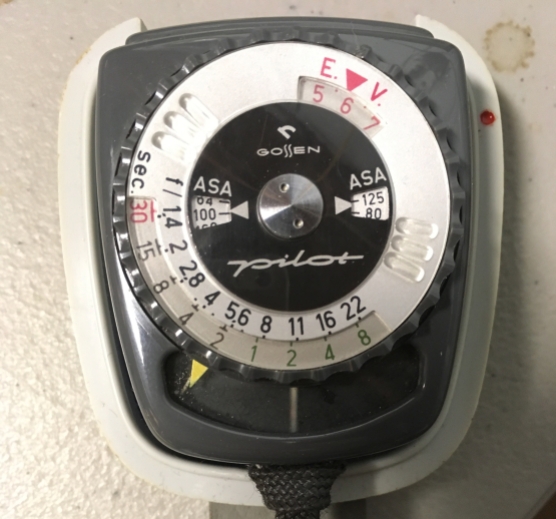
  11. If available place a light meter over the center of the focusing screen and using the reading calculate the necessary exposure.
  12. Close the shutter mechanism and set the shutter speed founding the preceding step. If using an improvised system without a shutter place a light opaque filter (i.e. tin foil) in the path of the illuminator.
  13. Remove the focusing screen and replace with a loaded film holder.
  14. Remove the dark slide from the holder.
  15. Operate the shutter to make the exposure.
  16. Replace the dark slide.
  17. Note the settings that were used to make the exposure if known. The voltage of the illuminator, color temperature, light meter reading, setting of the cameras control, and shutter speed are of particular usefulness. One should of course note the slides catalogue number, the objective, and ocular (if using one in the cameras light path), used.

General Program for Preparation of a Chitinous Specimen with Pressure

In the previous series I stretched a rather simple mounting technique out to a few thousand words. I did my best to make things clear and explain the why and how of things. It’s easy to understand that way, but it’s easier to follow along with brevity. Here’s the same information all in one page and about 500 words. Easy to print out and refer to as required.

1) Remove killed and fixed specimen from storage, clean superficially with a camel hair brush, and bring into distilled water if necessary (removing fixatives such as alcohol or formalin). Dry specimens do not need to be brought into distilled water.
2) Place superficially cleaned specimens into a 10-15% solution of caustic potash (Potassium Hydroxide) or caustic soda (Sodium Hydroxide) for macerating. Ensure sufficient of the macerating solution is present to remain at 10% concentration when the fluid diffused from the specimen(s) are added to it.
3) Retain specimen in solution for 12-72 hours, or until visual signs of internal organ decomposition. Alternatively, heat the specimen in solution for up to 30 minutes to accelerate the process, do not allow the vessel to “boil dry.”
4) Remove specimen from macerating solution and wash in several changes of distilled water.
5) Add 5 or more drops of acetic acid to specimen in distilled water, both to ensure complete removal of macerating solution and to further soften chitinous tissue. If required specimens may be stored in strong acetic acid until ready to continue.
6) Apply pressure to bulbous portions of the specimen with the butt of a camel hair brush or needle holder, working from the head and expressing liquefied internal organs through the anus. For small ants and thin bodied specimens this treatment is not required.
7) Lay specimen out in position desired for mounting on slip not suited for general mounting (slips with chips or imperfections may be used). Arrange all appendages as desired before continuing.
8) Place a second slip over the first applying pressure first at the head of the specimen, hold slips together closely and prevent slipping of one across the other.
9) Use clips or other convenient apparatus to bind slips tightly together.
10) Place bound slips into vessel of anhydrous alcohol (95% denatured if none better is available) and leave for not less than 1 hour to dehydrate and harden. Specimens may be left in alcohol until convenient to proceed.
11) Take bound slips from alcohol and hold close while removing clips holding them. Separate slips flooding with alcohol so that the specimen does not adhere.
12) Wash specimen into watch glass with alcohol and use a camel hair brush to remove any internal debris that adhere to the specimen.
13) Transfer specimen to clearer required by the final mounting medium to be used. Leave for as long as the particular clearer demands. 1-24 hours is the usual time.
14) Take specimen from clearer and allow excess to run off before placing onto clean slip for mounting.
15) Apply mountant to one side of a cleaned cover glass of appropriate size for the specimen and lower directly onto specimen.
16) Add mountant at edge of cover glass if insufficient mountant was used, clean exuded mountant from slide in the event of excess.
17) Affix temporary label to slide and put up for mountant to cure as required.