The setup for photomicrography can seem complicated. In fact it’s quite simple, and one already knows everything involved; provided of course there is some familiarity with the visual use of a microscope. Visually one need only place an object on the stage, direct the illumination of the light source, rough focus based on the objectives working distance, and move ones eye to the eye-point of the ocular. That done, adjust for fine focus and enjoy.
With photomicrography a camera is substituted for the eye. If the camera happens to have the precise optical characteristics of the operators eye then fine focus may be obtained visually and translate without adjustment to the camera. Otherwise the focus can obtained by some other component that duplicates the characteristics of the camera. In theory it’s simple. In practice—particularly if time has not permitted the fabrication of a coupler—switching from the focusing tube of the Kodak No.0 photomicrographic outfit to the camera is a recipe for vignetted images. Wouldn’t it be nice if the camera itself could serve for both focusing and photographing?
It absolutely can and it’s now the only method this technician would recommend if not using an integrated camera system!
Permit me now a lengthy aside not at all written in my usual, tedious, arms-length style. I had never before considered using sheet film in a box camera, honestly, never! Reading through the B&L Amateur Photomicrography manual I saw the words “use cut film” and about lost my mind. Cut film! It’s so obvious! I’m not a skilled photographer and as such am not prolific—more’s the pity I’ll take forever to get any good. As such I might go weeks before shooting the last of even an 8 frame roll of 127, and even longer as I stress way too much over exposure and generally end up with endlessly bracketed frames. But with sheet film! NO WORRIES!
It turns out sheet film is expensive, a dollar or more for B&W 2-1/4 x 3-1/4, Well, buy 4×5 and cut it down in pitch black! IN PITCH BLACK?! No thank you, I’m enough of a klutz with the lights on. But wait, X-Ray film is orthochromatic? X-Ray film is $20.00 for a pack of 100 5×7 sheets?! A single sheet will cut down to 4 of the slightly less than 2-1/4 x 3-1/4 frames that will fit in Kodak No.0 which means I get sheets of film I can work with under red light for $0.05 a frame! So, yeah, I’m all over that!
Using orthochromatic film would have been easy in the time when the B&L Amateur Photomicrographic outfit was new, today it’s a bit of a wait to obtain film as it will nearly always need to be ordered from a medical X-Ray supplier. With film in hand and all in a changing bag or darkroom remove a single sheet to be sacrificed. Use that sheet to trace out the size of a frame which will just fill the film plane of the camera, and cut it out carefully. Once the size is perfect a method of safely cutting down the film under a dim safelight will be needed. To that end obtain a guillotine paper cutter. Lay the cut down sheet on the cutter and align the long edge with the blade. Then put down a length of white (or otherwise highly contrasting) tape aligning that with the edge of the film farthest from the blade. Repeat lower down from the taped guide for the short edge. By this means a full size sheet may be speedily cut down to precise dimensions in the dim safelight (or total dark if sufficient care be taken).

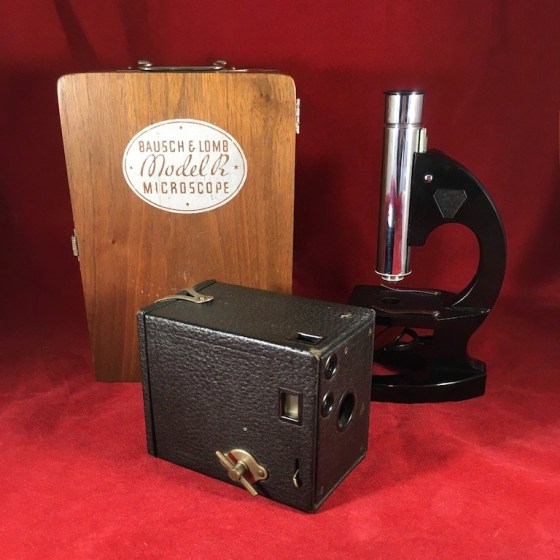
Model R arranged for photomicrography
In a dark room (for simplicity) one should arrange the microscope so it be secure (rubber bands wrapped about the foot will give the Model R a firm grip). Further bands may be used to secure it to the base of a ring stand if one be employed. The arrangement shown at left illustrates the method described. For illumination any handy source may be employed, though it is advisable to use as a source something well baffled which will not permit stray light to fill the working area. Stray light is less a concern when working with roll film but for use with cut film it should be well avoided if at all possible.
Working in subdued lighting one may open the rear of the camera and use a sheet of cut (but exposed to room-light and undeveloped) film as a focusing screen with the shutter held open. Place the film in the back of the camera and carefully arrange the camera over the eye-piece. Turn on the illuminator and make adjustments as required for alignment of the whole apparatus.
When all is well positioned turn out the room light and illuminator. If working with orthochromatic film one may turn on a safelight. Place a sheet of unexposed cut film into the camera, taking care not to move at all the camera or focus of the microscope. Turn on the illuminator and trip the shutter of the camera. Working as just described will likely result in blurry images due to camera shake. Rather than more securely arranging all the elements one may simply leave the cameras shutter open and control exposure by turning on or off the illuminator or placing an opaque card into the light-path.

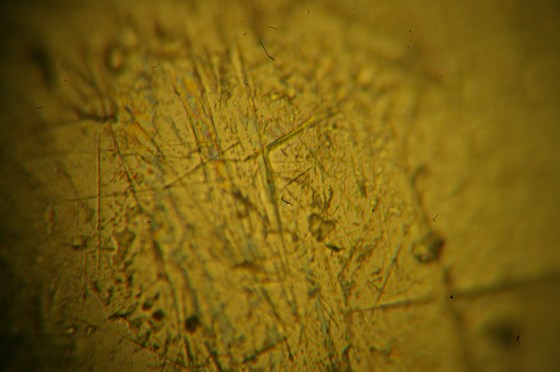
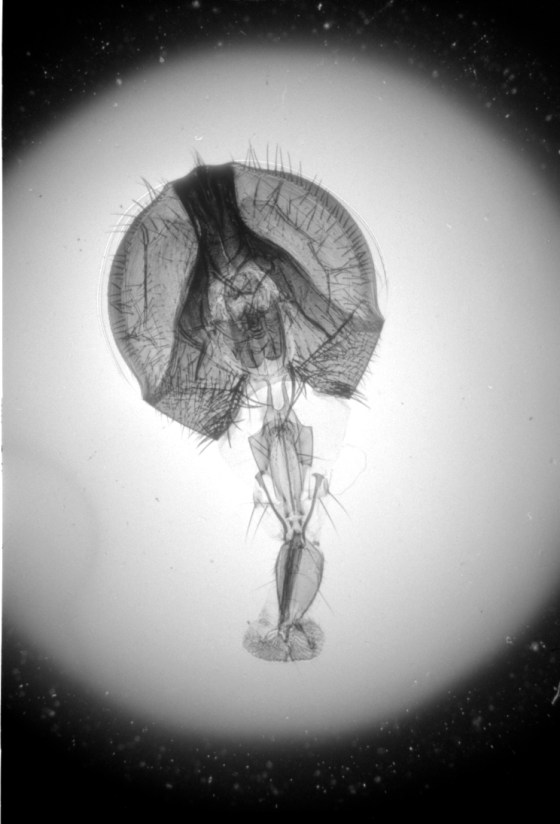
Wet-printed diatoms from X-Ray film exposed with the Kodak No.0 and Model R

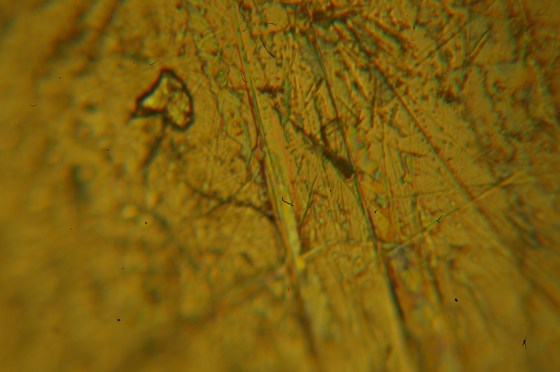
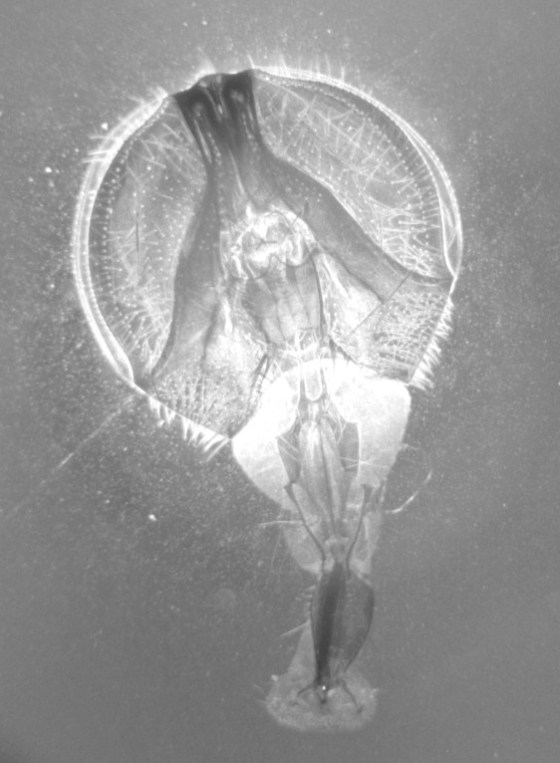
Wet-printed thin section from X-Ray film exposed with the Kodak No.0 and Model R
The images above were enlarged onto Fomalux silver-bromide enlarging paper from X-Ray film negatives which were exposed using the Kodak No.0 Amateur Photomicrographic apparatus and Model R microscope from B&L. The issues seen in the thin section (lack of uniformity in lighting) is from a processing defect (uneven development) and is present in the negative. In all of the above images the obstruction of illumination was used in place of the cameras shutter and the front element of the microscope objective on the Model R was removed.
The resolution of the diatoms in the image at left is far better than one could have expected from a “toy” microscope. No doubt the impeccable condition of the Model R contributed significantly. It’s worth noting as well that without a meniscus lens (as would normally be found in a Kodak No.0) only the Model R’s well-engineered optics were able to affect the image. One is certain to find significant loss of resolution if working with a Kodak No.0 (or other box camera) that has a meniscus lens.