An ounce preparation is fine but a pound will go farther, so here’s hoping no one skipped the previous post. -K
Preparation
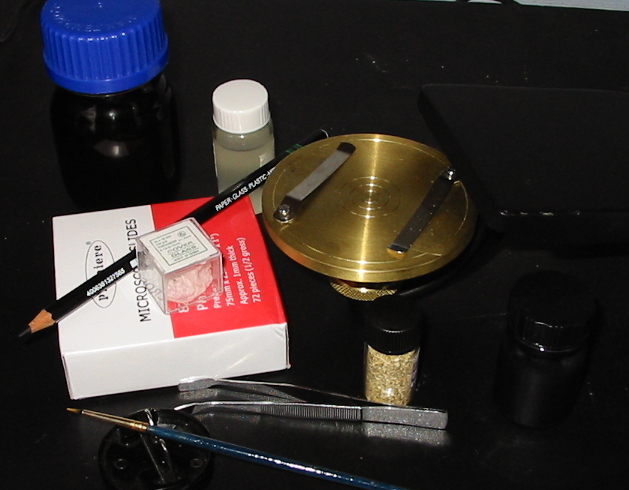
The following is only slightly different depending on the specimen/specimens to be mounted. In the case one may wish to mount objects beyond those described, the following may be helpful. Consider that what may be mounted in a dry cell is extensive but, in general all may be divided into three categories.
- Those which are adhered to the cover glass: diatoms and other very small delicate objects.
- Those which are adhered to the slip: small objects that may be damaged by moving about within the cell.
- Those which are loose within the cell: soil, sand, and portions of feather are the usual.
In this case, objects of the second variety are being utilized; specifically microfossils, but any other items failing into the same category may be used. Due to wide availability and comparatively large size, microfossils, micrometeorites, and other similar objects are an excellent first choice for one not yet acquainted with the technique. Whatever is selected, first see that it is prepared for mounting by ensuring it is totally dry and devoid of contaminating debris.
Mounting

Bausch and Lomb Dissecting microscope W
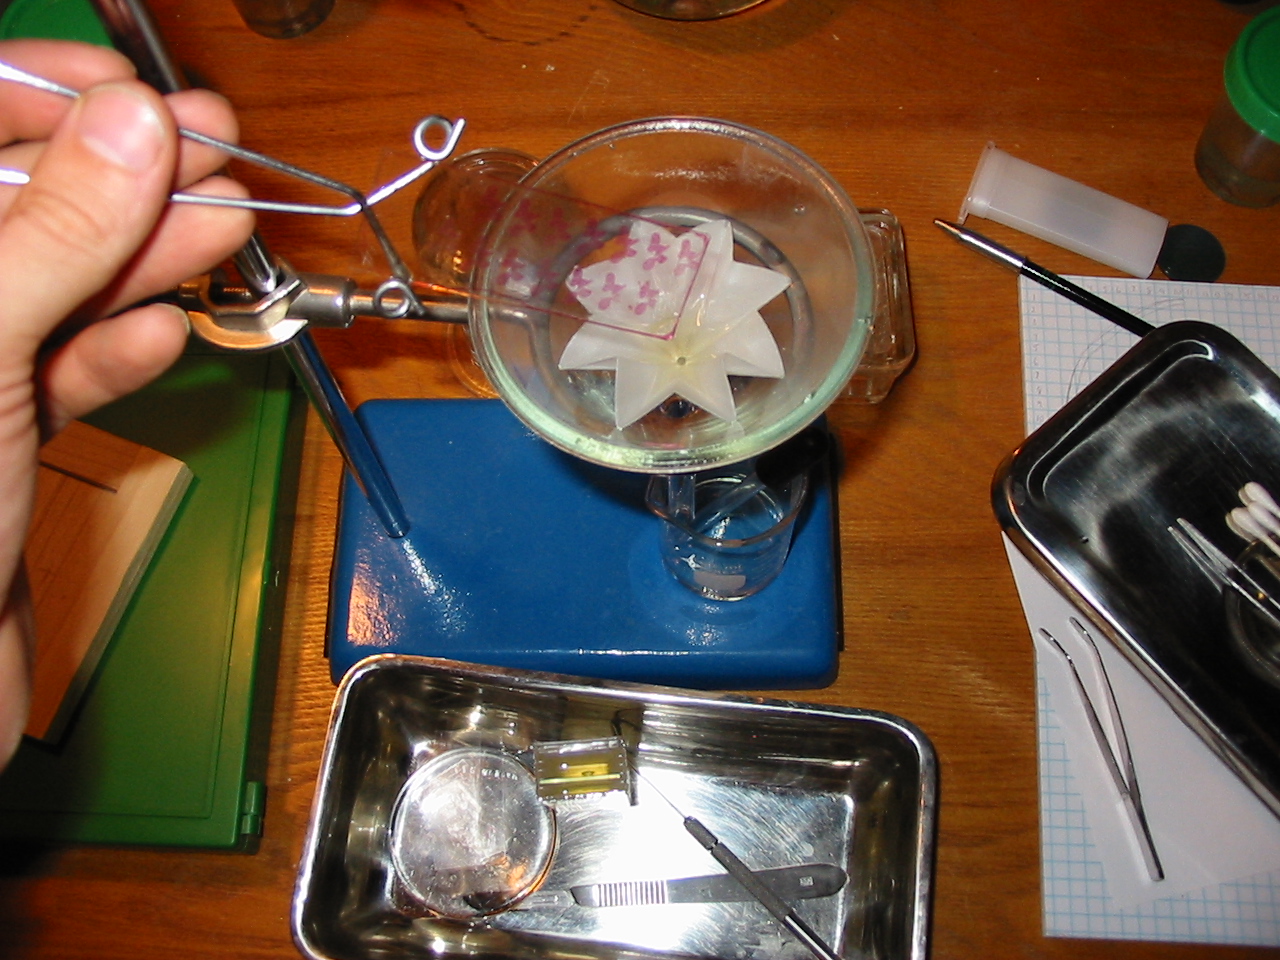
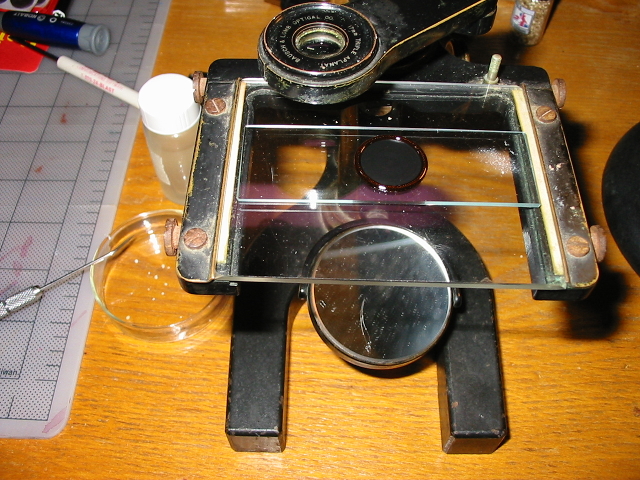
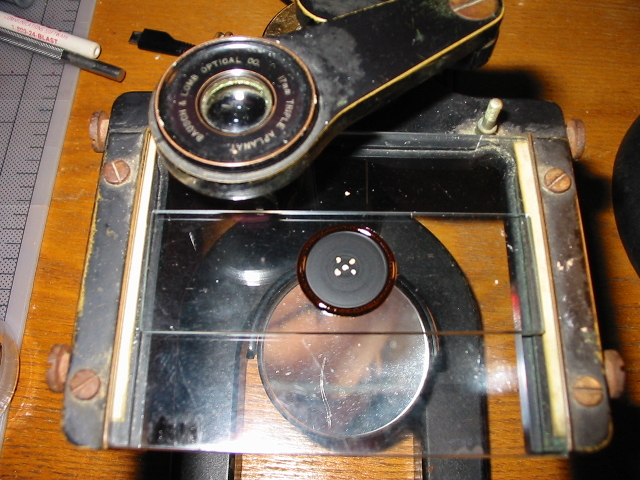
A petri dish, watch or Syracuse glass is useful for laying out objects. Select a quantity of objects which are of a size to fit beneath the cell vertically and lay them out (on a handy surface) in a pleasing or utilitarian way horizontally. Place the slip (with cell) near to the surface on which the specimens have been lain out; some will find a dissecting microscope or loupe useful if inherent vision merits. An old style dissecting microscope may be found suitable, as one may easily move the lens aside when it is not required.
Depending on the adhesive employed… Gum tragacanth is the finest choice so far as the author is concerned. It is inexpensive, sufficiently able to adhere most objects, of a quality to persist over time (as evidenced by historical use), and is hydrophilic enough that it will absorb moisture to an extent that condensation will be prevented from forming within the cell. …one may be required to act differently.

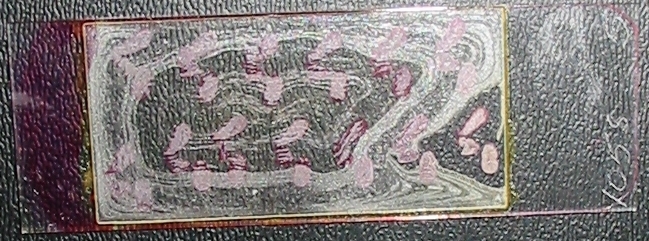
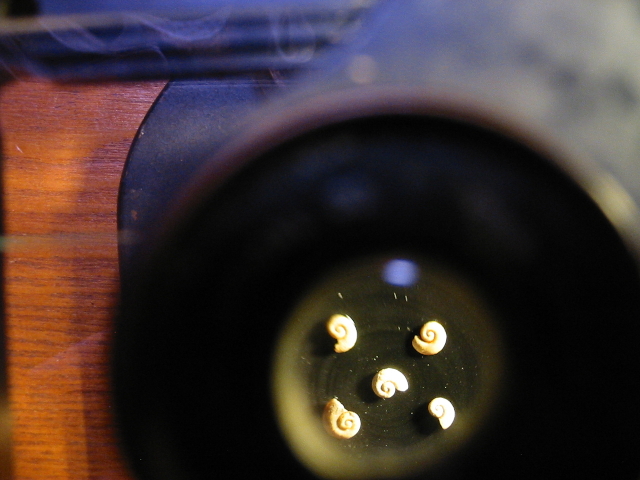
Five small conispiral gastropod shells
Using a fine camels hair brush one must apply adhesive either to the surface on which the specimen will be mounted or onto the underside of the specimen itself. For some adhesives a needle in a holder or hemostat will serve. Some adhesives are more forgiving than others as regards positioning, but at all costs one must avoid allowing any adhesive adhere to an observable surface. One should be aware that some adhesives dry opaque or with a gloss finish that will show conspicuously in the finished mount. For the smallest objects one may paint the entire surface with gum and allow it dry. When an object is placed one need only direct a breath of moist air onto the whole to render the gum adhesive.
Geometric arrangements are pleasing but utilitarian layouts have some advocates as well. One may wish to layout specimens so that they are within the field of view of a particular objective (I should post about that sometime) and such an arrangement may be made to permit isolated observation of an individual specimen.

This arrangement offers differing perspectives of similar objects
Post Placement
When the specimens have been placed one need only permit sufficient time for the moisture (that may or may not be) inherent in the adhesive to dissipate. In some areas (geographically speaking) and circumstances this may only entail permitting the slip to stand out in a dust free area for some minutes or hours. It is noteworthy that (in many locations) humidity will be lower in the winter and contribute to lower than general humidity (at ambient temperature) within the cell, which is desirable and will tend to prevent condensation on the underside of the cover glass.
Covering
Prior to sealing a cell mount one must be confident that the humidity of the specimen is lower than the humidity of any environment in which it is apt to find itself, and that the positioning is as perfect as it might be. Many adhesives will require several hours before the required conditions are met. However, once such is the case the cell should be sealed. Examine the slip under low power to ensure no dust has landed on the objects and all is as it should be.
Sealing
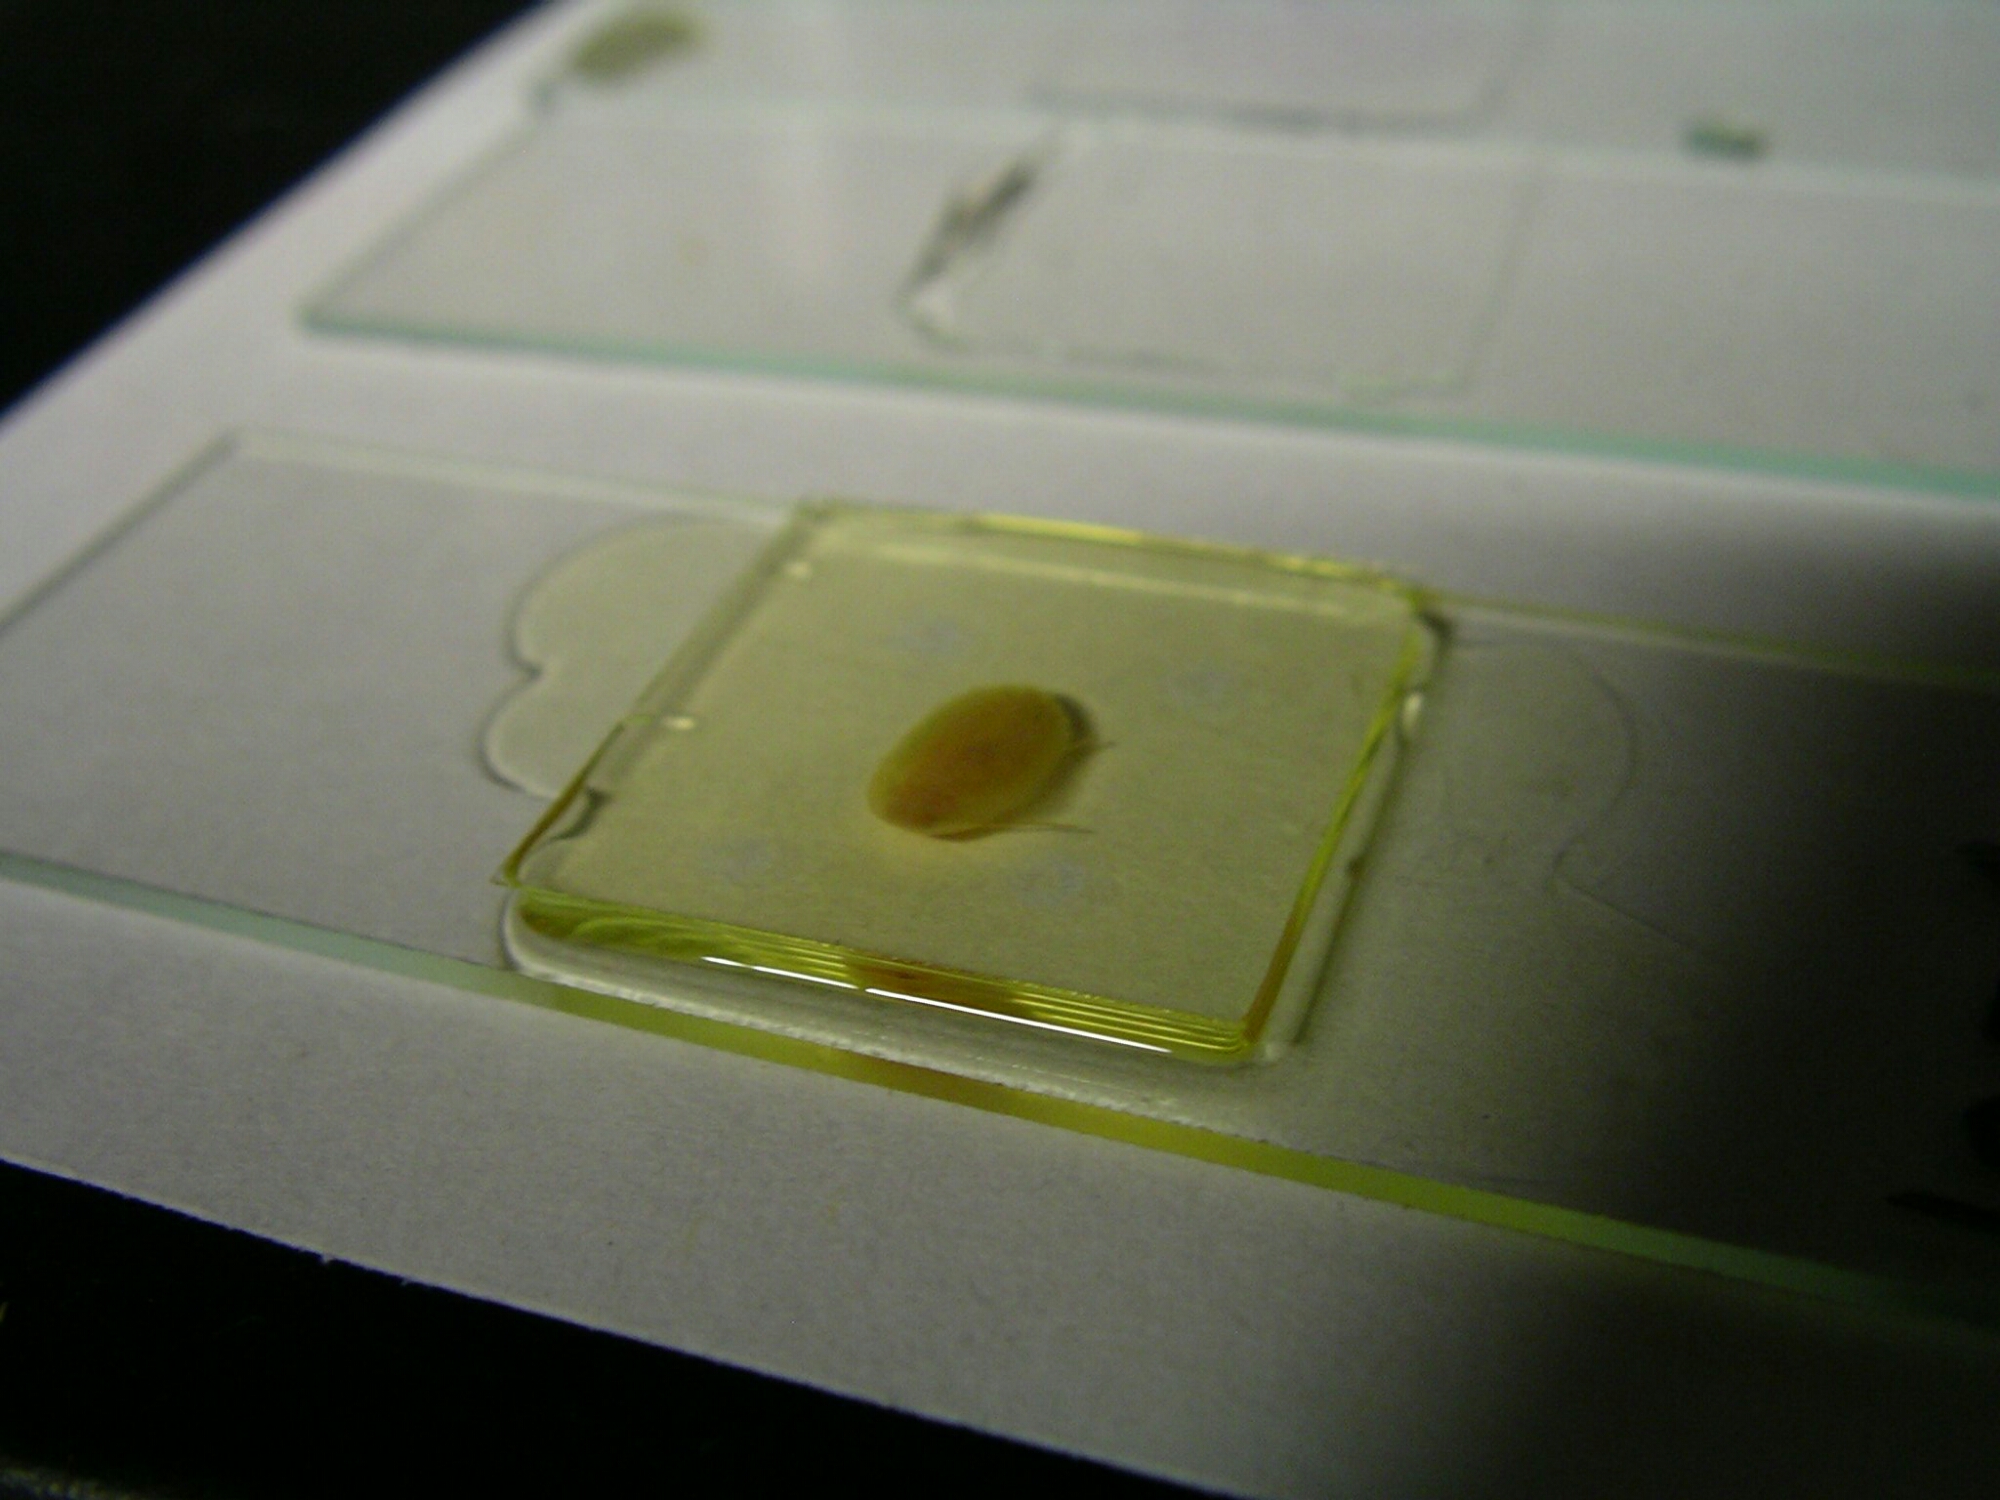
Sealing is distinct from covering in the sense only that a cell which is covered might still be exposed to the environment at large (yes such a thing exists). To ensure that the cell is sealed one must use a cover of a size for the cell. The underside of the cover should rest upon the top of the cell, and the edge of the cover should not extend beyond the outer surface of the cell. Place the cover across the cell first to verify the size. In the below image the figure on the left is correct. The above on the right shows a cover glass which is too small, below is one which is too large.

Post-it notes are excellent!
Some texts recommend heating the slip so that the shellac cell is rendered soft and then applying gentle pressure to the cover to form a seal. This method has the advantage of eliminating imperfect seals which result from imperfections in the top surface of the cell. Regrettably, this method may also tend to deform the cell if the slip is heated too much or for too long. One may achieve as effective a seal by painting a ring of fresh shellac on the cell before placing the cover glass. Once the cover glass is in place set a ring of shellac around the margins of the cover to ensure that the seal is hermetic. A few layers of shellac are recommended so that the cover is well secured mechanically.
At this stage the slide is complete. Once it has dried many persons elect to give the cell a coat of decorative paint. I find the appearance of plain (dark) shellac acceptable.

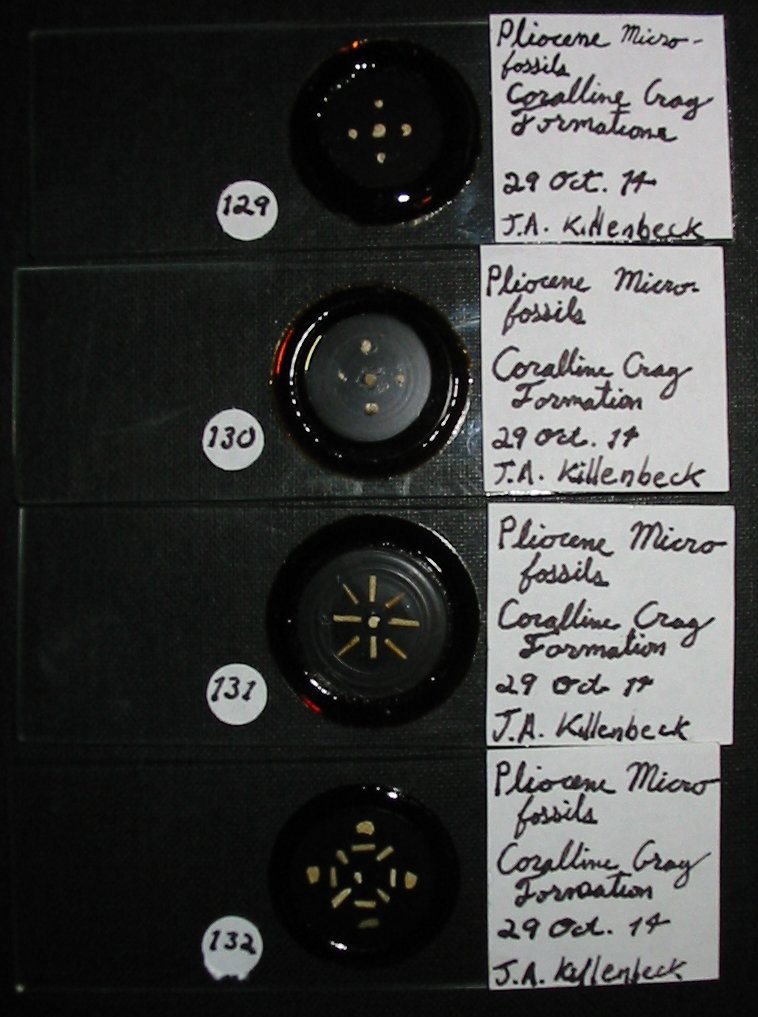
Note the errant adhesive on #130, that is why I do not recommend rubber cement.