Projection Microscopy I

There are Objectives and There are Objectives

For anyone who follows microscopy in only it’s modern form, it might seem as if it’s all been figured out and objectives are as fitted to the stand and needs of the microscopist as a key is to a lock. For those who have a few different manufacturers microscopes in the lab it might be more apparent that it is not all figured out; some favor DIN standards or the classic RMS standards, this stand requires infinity corrected objectives while that does not. If the microscopes is “of a certain age” one might be distressed to find that its objectives are par-focal for odd lengths or incompatible with lenses of an earlier or later vintage. Knowing a little optics one will quickly become aware of the importance of using the proper objective for the stand to obtain the best image.

When considering the genuinely antique microscopes one might at first find things more rather than less confusing. Manufacturers of one line or another included different portions of the microscope body when measuring for tube length, in essence quietly adopting different tube lengths than that marked upon the objectives barrel. Cover glass thickness was as variable then as now and so were the thicknesses for which objectives were corrected.

But if the standards to which an objective was built were less, standard, so too was the stand more fluid. Oculars were never integral, tube length was variable, often enormously so, and the microscopists knowledge of their instrument was nearly important as the instrument itself. It can truly be a daunting task to search out the components necessary to outfit an antique microscope be those items hidden in dusty shops or dark attics. More daunting still may be the hunt for the information required to use the latest find effectively. Permit a weak attempt to throw some light on one dark corner.

Projection Objectives in Theory

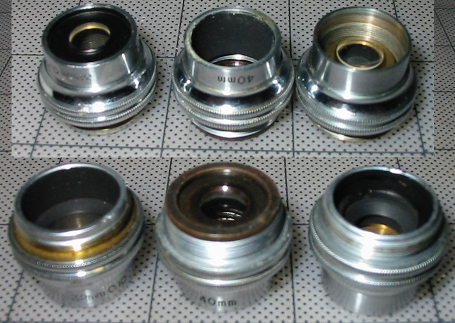
Most are familiar with achromatic and apochromatic objectives, with oil or water immersion, even the specialized Homal photomicrographic objectives, but the projection objective was an entirely different animal. Designed specifically for micro-projection the objective had several difficulties to overcome. These difficulties will be familiar to the modern worker, however much the method by which they are solved has changed.

Projection adds a variable that is an established constant in normal microscopy, projection distance; the distance at which the projected image forming rays are interpreted by the viewing surface. While the objective provides the magnification of the object, the projection distance is responsible for enlargement only; a magnification of ten diameters is a magnification of ten diameters be the image an inch across or a foot. All of the visual information that will be present in the projected image is resolved (added) by the objective. The enlargement serves only to act upon what is already present and might be of any size depending on the need of the microscopist.

The projected image increases in size as the distance at which the projection is interpreted is increased because the light which exits the optical system is diverging. As the light diverges a constant amount of illumination is asked to light an ever larger area. Naturally, one can not expect to light up a drive-in theater screen with a classroom film-strip projector; so too one should not expect to set an image five feet high on the far wall of the room with the usual sort of illuminator. The projected image will become dimmer as it is enlarged and any aberration will become more apparent.

Because spherical aberration increases at the edges of the field of view, it was frequently practice to simply limit the field of view to provide a restricted but more perfect image. Spherical aberration might also be corrected by the introduction of additional component lenses which would entail an attendant decrease in brightness, just as with chromatic aberration. Spherical aberration and chromatic aberration are two difficulties that all objectives strive to overcome to a greater or lesser degree. Doing so while maximizing the amount of light which enters (and therefore exits) the system is a similarly common goal.

One might question why then a projection objective should be any different from a standard objective. In normal (non-projection) objectives the entire optical system was considered and constructed so that the virtual image viewed by the microscopist is as perfect as might be for a particular need. For projection microscopy the real image is the one which must be rendered the most perfect and the equations of the optician altered accordingly. Projection objective would often be employed alone, without the addition of an ocular all of which must be accounted for in its construction.

In any case the important thing to remember is that normal objectives work with the microscopists eye as the final component of their optical system, for projection objectives that final component is the screen upon which the image is thrown.

Still with me? Don’t worry this will all get more fun shortly. -K

Determining Objective Magnification

Here’s hoping this is useful as more than just an academic exercise. -K

In the previous post we looked at equivalent focus as it relates to the power of an objective. It was noted that the power marked explicitly on ones objective is sometimes at odds with that implied by the equivalent focus. Today we’ll look at one way to determine the actual power of a given objective. The method used is among the more equipment heavy, but it is also one of the least demanding so far as manipulations go.

One will need the following:

  • A microscope with a draw tube (or an eyepiece collar)
  • A 10x Huygenian eyepiece
  • A 10x Ramsden eyepiece
  • A stage micrometer
  • An ocular micrometer (installed in the Ramsden eyepiece)

Method

Using the Huygenian ocular, with the stage micrometer as an object, and the draw tube set to the length for which the objective is corrected (160 in most cases) the objective to be measured is brought into sharp focus. The Huygenian ocular is then replaced with the Ramsden and everything brought into sharp focus by moving in or out the draw tube. One must not focus using the microscopes coarse or fine adjustments.

Line up the rulings of the stage micrometer so that a given number corresponds with a particular span of the rulings on the ocular micrometer. Be sure that the rulings are lined up consistently, do not measure from the outside of the line in one place and the inside in another. Use as much of the available rulings as possible for increased accuracy. Write down the rulings on the stage micrometer that are required and the corresponding number from the ocular.

Now divide the distance of the rulings on the ocular by the distance of the rulings on the stage. The dividend is the ocular independent magnification of the objective.

In Practice

A stage micrometer is measured against the Ramsden micrometer eyepiece as described above. Rulings on the stage micrometer are .01mm apart and rulings on the eyepiece micrometer are .1mm apart. It is found that 95 rulings on the stage micrometer correspond exactly to 98 rulings on the eyepiece micrometer.

9.8mm / .95mm = 10.3

The objective then, provides 10.3X magnification.

With a different objective it is found that 15 rulings on the stage micrometer correspond to 65 rulings on the eyepiece micrometer. Once again we work in consistent units of measure.

9.3mm / .22mm = 42.27

The objective then, provides 42.27X magnification.

In Theory

Some users may immediately wonder why it is emphasized that one must focus with a Huygenian ocular, only to replace it with a Ramsden fitted with a micrometer, and manipulate the draw tube for focus. Why shouldn’t one simply use a Huygenian ocular fitted with a micrometer? After all it works for measuring structures.

First consider the construction of a Ramsden ocular. The positive ocular forms a real image below its field lens, outside of the influence of the oculars magnification. A Hugenian ocular, a negative ocular, only forms a real image after light from the objective passes through its field lens. The upshot of which is that a Huygenian ocular will measure an objective as more powerful than it is.

Why then does it mater if one focuses with a negative ocular like the Huygenian but measures with a positive ocular like the Ramsden? The simple explanation is that doing so negates the magnification that results from the eye viewing a virtual image on which a real image of a ruled reticule has been overlaid. Using the Ramsden only will again result in a distortion of the objectives power.

Notes:

∗An eyepiece collar is a small, friction fit, split disc which rides around the outside barrel of an eyepiece and prevents it from seating fully into the microscopes body tube. Such a collar can provide a microscope not equipped with a draw tube with much of the same functionality.

†A Huygenian filar micrometer used with the objectives above measures their powers as 11.37X and 47.8X respectively.

‡In this case the Ramsden eyepiece alone measures the objectives powers as 10.2X and 43.3X. These distortions represent the degree to which the focus was adjusted by manipulation of the draw tube after switching from the Hugenian ocular to the Ramsden.

Equivalent Focus

Just a little something a fair number of microscopists do not realize, or give much thought if they do. -K

For many, equivalent focus is nothing more than a little marking on their objectives or nosepiece. Modern objectives are apt to be marked with all manner of things, most commonly it will include the following: the manufacturer, a serial or part number, the power, the numerical aperture, and the equivalent focus in millimeters. Less commonly an objective might also be marked with patent dates or numbers, the immersion medium (if any), the variety of lens system, the proper tube length, specialty symbols for infinity correction, colors designating various powers, intended coverglass, marking for correction collars, even zoom or variable focus markings. Most of the markings are self explanatory, but equivalent focus can be a bit confusing.

When working with antique or vintage gear the equivalent focus (hereafter abbreviated EF) may be even more complicated, and more useful. The farther back one goes the more likely one is to find less explicit information marked on ones objectives. Sometimes the only information will be the manufacturer and the EF, if one’s particularly lucky the tube length will be marked as well.

None of these objectives are marked with their explicit magnification.

None of these objectives are marked with their explicit magnification.

In the above photo one can see a variety of objectives. At the far left is an old system objective marked 2/3 0.25N.A. 160 Tube Length, comparatively explicit as we shall see and oddly mixing metric tube length with a fractional inch EF. That to it’s immediate right is marked only with its EF, 32mm. Beside that is one marked 4mm 0.85 215mm T.L. its neighbor is the same in all respects but for a 165mm tube length. Next is an 8mm 0.50 N.A. for 215mm T.L and finally a 1.9mm 1.32N.A. fluorite for 215mm tube length.

What is Equivalent Focus?

The equivalent focus is a means of expressing the power of an optical system. Instead of expressing that directly as a diopter measurement, or explicitly as the diameters of magnification, it is provided as it relates to the focus of a simple lens at a distance of ten inches. This seems an odd way to describe the magnification of any optical system, until one recalls that the microscope is built around the natural relaxed focus of the human eye; ten inches. It seems even more odd now that the metric system has been universally adopted by microscope manufacturers, and microscopes are no longer physically ten inches in length.

Determining Magnification from Equivalent Focus

For quite a long time the older system of measure was used extensively and objectives would be marked with a focal length expressed in fractional inches. When the microscope used a tube length of 10 inches the mathematical determination of magnification from EF was very simple.

Tube length / fractional EF = magnifying power

One may determine the power of a 1 inch EF objective immediately because at ten inches it provides a magnification of 10X. A 1/2 inch objective then provides a magnification of 20X, a 2/3 inch objective provides 15X, 1/6 inch provides 60X, and so on. Relatively simple, and although less direct than marking an objective with the power itself, fractional inches are easy to convert to magnifying power. When the 160mm tube length became common, if not standard, fractional EF was still used and manufactures simply modified the actual power of the eyepieces to provide the marked magnification.

After metric measurements became standard§ the equivalent focus could still be used to quickly determine the magnifying power. Using the above equation one could simply substitute the metric tube length for the metric EF. A 25mm EF objective intended for a 250mm tube length would provide a power of 10X. A 16mm objective for a 160mm tube length system also provided a magnification of 10x.

Things Get Complicated

One with any experience with microscopes is apt to immediately find that their objectives do not bear out the above equations when using other metric EF’s. A common B&L objective marked 4mm might also be marked 43X rather than the 40X one would expect. Is one to believe then that the objective is intended for a 172mm tube length? Absolutely not, rather one should recognize that the powers marked on objectives and the EF is intended as a general designation and not a rigid designation as it is generally taken.

One finds objective marked with two designations of power that are only generally equivalent to each other. The situation prompted one respected authority to write “The engraving of E.F. in terms of millimeters is a stupidity that should never have originated, let alone be used by American manufacturers.” This position is understandable because so many objectives may be found to provide levels of magnification quite at odds with those marked.

In General

If one needs to know the relative power of any objective it’s simple enough to consider the EF and understand that the longer the EF the lower the power, and the shorter the EF the higher the power. It’s common for objectives to be marked with both their explicit power and their EF however, as power diminishes the barrel of the objective becomes physically shorter and there is less room for markings of any sort. It is not uncommon then for quite low power objectives to be marked with the power only as expressed by EF.

Most every objective having an EF of 30mm or greater will not bear an explicit marking of its magnifying power. Objectives of from 48mm to 2mm EF are commonly available for use with compound microscopes. For most uses the following list may be used to estimate the magnifying power from the EF:

 2mm EF provides 90X
 3mm EF provides 60X
 4mm EF provides 45X
 8mm EF provides 20X
16mm EF provides 10X
30mm EF provides 3.5X
48mm EF provides 2X

Notes:

∗This could mean anything from marking the lens as an achromat, flat-field, apochromat, fluorite, strain free, phase, polarizing, or nearly anything else. There are all manner of specialty arrangements and they are frequently marked. Somewhat vexingly, vintage and antique lens are often lacking as to this information leaving one to track it down in old catalogs and promotional papers.

†The familiar times linear or diameters of magnification can often prove complex in historical papers as it was occasionally used to refer to a square rather than a linear measure. Here it is meant to be accepted as the modern form 10X providing a magnification sufficient to magnify a 1µm long object to 10µm.

‡Dr. Gage writes in the seventeenth edition of his encyclopedic monograph The Microscope that the reduction of power caused by using objectives at a 160mm tube length was made up for by rating oculars below their actual power so that the magnification marked on the  objective and ocular would provide the actual magnification of the system only when multiplied. He goes on to credit the Spencer lens Company of Buffalo, New York with beginning the trend in 1901-2 of marking both objective and ocular with an accurate measure of their power in addition to their equivalent focus.

§Standard didn’t always mean practical. It wasn’t uncommon for individual workers and laboratories to work in one system of measurement and then convert it to metric for publication. If one ever references a historic paper and finds it littered with strange metric units seemingly chosen for no reason, converting them to imperial units, English units, or United States customary units can often prove amusing. Don’t judge the authors too harshly though, equipment using the metric system was often a hard to justify expense when the old gear still worked.

‖That authority is Dr. Peter Gray. His works on microscopy and microtechnique are invaluable to the beginner and skilled microscopist alike. Oddly enough, his method of determining the power of an objective from its metric EF is to convert from millimeters into fractional inches then calculate; rather than work in millimeters and divide the tube length by EF. All the more odd for the fact that his most significant works were published more than twenty years after the work of Dr. Gage referenced above.

Divisible Objectives and my Favorite Stand

Things have come and gone in microscopy through the years. Some have been happily put aside as inconvenient when new advances were made and others have been quietly forgotten. I for one lament the passing of divisible objectives. -K

For a great many years it was considered abnormal and a genuine extravagance for a microscopist, even a professional, to be in possession of more than one stand. Optical apparatus was expensive, prohibitively so. Before continuing permit me to digress and provide an bit of example; consider that in the 1930 bound catalog of Bausch & Lomb an achromatic objective of 2x magnification was priced at $5.00, the equivalent of $71.10 dollars today. One could also have a 10x for $8.00 ($113.76). The full complement of dry achromatic objectives with magnification spanning 2x to 60x, some eight objectives in all, would have cost the princely sum of $86.00, $1222.93 in todays dollars according to the consumer price index, and been beyond the means of even the well-funded.

It’s easy to understand that for most microscopists it proved sensible economically to purchase a middle of the range 10x objective and use it with a comparatively inexpensive low power ocular when less magnification was required switching to a more powerful ocular as nessacary. In part because of the expense some things were done that would not be considered sound by the standards of today. One of those things, which no doubt seems somewhat blasphemous to todays workers, is the divisible objective. They turn up not infrequently on stands dating to what I think of as the “Black & Brass” era with rarer examples in the “Fully Brass” period preceding and becoming most common in the “Fully Black” period after the first world war. I can only hope for forgiveness regarding my rude designations of time but this is all very general.

A divisible objective is one in which the front and back optical components may be separated to obtain lower magnification. Bausch & Lomb produced these prolifically in the 16mm size so that with the front component in place 10x magnification was provided, while the rear portion only provided approximately 4x. By purchasing a divisible objective one was effectively provided a 16mm and 32mm objective in one unit. Most of the manufacturers provided divisible objectives of one sort or an other but the divisible 10x was certainly the most common from any source.

In 1925 Bausch & Lomb was granted a patent for a new system of constructing parfocal objectives that no doubt grew out of observations made while manipulating divisible objectives. The patent may however, have been an effort to cut down on competitors production of divisible objectives more than anything else, as the usual method of employing rings of varying thickness around the threads seems a great deal more convenient.

Image

For comparison

Above one may see a B&L 32mm objective, 40mm objective, and 32mm equivalent portion of a divisible 16mm objective. It’s worth noting the differing position of the optical components of the objectives and that any of these objectives will work usefully on a compound microscope. The stand seen below is a perfect example of the sort of microscope on which one could expect to find a divisible objective.

Image

No clips because I never incline my microscopes, it being my habit to work standing

The above is a Bausch & Lomb stand from the late 1940’s (easily dated by the double knurled heads). One can see the assembled 10x divisible objective in position and compare its outline with that of a non-divisible objective. This is in fact my favorite stand for micrography, photomicrography, measuring, and most general work, it shows every evidence of having been an economically prudent apparatus while not neglecting function.

This particular stand was assembled by Lukas Microscope Service of Skokie, Illinois. The company was founded in 1931 and is still in business today. They provided this microscope with a fixed, removable, 1.20 Numerical Aperture Abbe condenser with iris diaphragm and filter holder, the usual two sided mirror, and three objective turret. I keep a divisible 10x B&L, a 43x B&L, and a high dry 60x B&L in place on this stand and find few objectives more suitable for measuring the thickness of a mounted specimen than the 60x.

One final point concerning this lovely instrument, it is the most modern model I own which retains a draw tube. For any who are products of the modern age and have not had the pleasure I will say a draw tube can be unspeakably useful. Properly dispositioned it’s the work of a moment to compensate for an unexpectedly thick (or thin) cover glass, or increase or decrease magnification. Of course there are attendant sacrifices optically but I can’t count the times I’ve been able to better measure the size of a structure because I’m familiar with the workings of a draw tube for given combinations of objective and ocular.