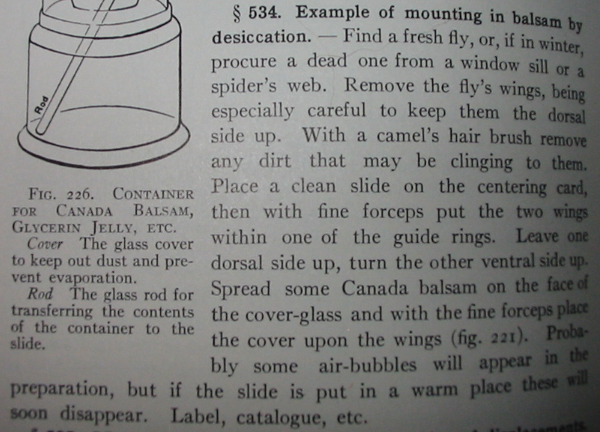
When one buys a big old house it generally comes with a big old attic, and in my part of the world that means scores of dead flies as well. However unsavory it may be to a new housekeeper it is a boon to the microscopist. Yesterday I put together a quick little centering card and today I put it to use. Just as the general plan of that card was taken from the pages of Gage’s The Microscope, so to are our current efforts. A page or so beyond his illustration of the centering card is the innocuous little paragraph shown here:
The entire operation sounds simple enough but let us first assemble the required supplies. One will of course need a number of dead flies, or rather their wings but generally the fly remains with the wings. A similar number of cleaned slips, and their attendant cover-slips should also be readied with labels attached. Labels could be neglected until the slides are finished, but I find it convenient to attach blank labels to my slides before mounting so that I might mark penciled notes upon them if the need arises. The centering card which was made previously should be brought out, or some other means of positioning the specimens in the center of the slip. A fine camel hair brush, a pair of forceps or two, and a pin in a holder will prove invaluable, but could be dispensed with by the specially careful and dexterous. Finally a resinous mountant is required. I will be using natural balsam today but Euparal or one of the synthetics could be used in its place.
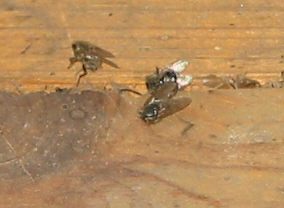
I collected nearly a dozen dead flies this morning from the floor of my attic and a quick look at my Audubon field guide showed them to be some species of Pollenia, very likely P. rudis. Identification is somewhat secondary to the goal here, though It is nice to be able to properly label the prepared slides and enter the scientific name into ones catalog. If an identification can be made wonderful, but we are really out for mounting practice today. My specimens gathered I retired to my work area. It is often a great help to work over a surface on which the specimen stands out in sharp contrast, so I laid a sheet of plain white copy-paper on my table and deposited the flies in one corner.
The specimens being exceedingly dry at first rendered dissection quite tedious. Each attempt at grasping the body of a fly with forceps resulted in a powdered portion of Pollenia. I tried holding the fly to the table with a camel hair brush and carefully pulling the wings off by grasping them at their base with my forceps and had some success. In the end I found grasping the abdomen lightly with one pair of forceps and pulling the wings off with a second pair of forceps by grasping them their root the most expeditious method. I took care to keep aware of which side of each wing was dorsal and completed each slide before beginning an other dissection.

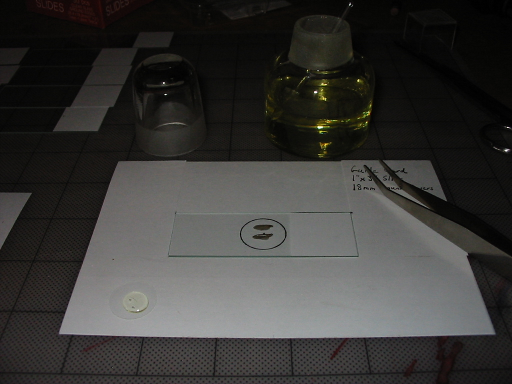
With a set of wings removed I placed a clean slip upon my centering card and transfered the wings to it on the tip of a camel hair brush. Once there it was easier to position the wings using a needle as the wings showed a tendency to adhere naturally to the brush. I positioned the wings around the center of the slide as recommended by Gage with one dorsal side up and the other ventral.
Next I placed a large drop of balsam in the center of a cover-slip and allowed it to spread out a bit of its own accord. I found the amount of balsam excessive on my first attempt and in the remaining slides I was careful to apply less and spread it out on the cover-slip with the glass applicator rod.
Gage recommends placing the cover-slip by grasping it with forceps. Some people find this a simple operation but I often end up grasping it rather too firmly and damaging it. When placing a cover-slip I find it simpler to grasp it by the edges between the thumb and fore-finger, lowering it vertically so that the suspended mountant touches the specimen first. Upon releasing the cover-slip a small amount of even pressure is all that is then needed to complete its application. This method helps to prevent specimens which are not affixed to the slip from moving from their intended position.
In the space of forty minutes or so I was able to produce ten slides and each one showed at least one air bubble. I placed each slide in a covered tray and carried them to the attic. Gage wrote that “if the slide is put in a warm place these will soon disappear” and I expect it will reach eighty degrees Fahrenheit in the attic some time this afternoon. One can only hope that the bubbles are expelled.
