Apart from the chemistry, (and it’s worth knowing that’s the lingo) in order to do the actual processing one will need something to do the processing in. In keeping with the philosophy that the best material is worthless if one hasn’t got it I’ll begin with something that’s likely to be on hand, and move forward from there.
Film processing tanks
Tray Developing
No need to rush out and order some fancy perfectly size plastic or enamel developing tray, a cheap plastic storage box or even a Chinese take out container can serve as a processing vessel. If going this route one will need three trays to make things easy, and a darkroom. Don’t discount this as an option if a darkroom isn’t available. Working at night can go a long way to solving most of the troubles of setting one up and a roll of aluminum foil and some masking take can handle the rest. There isn’t really a need for a safe-light but it goes a long way to making things easier. There’s no need to buy a fancy or expensive safelight either, a can of red spray paint can transform a standard lightbulb. The ubiquitous smart-phone displaying a full screen solid red picture works just as well, it’s a little safer to just adjust the display settings for a deep red tint though.
One will have to figure out the volume of chemistry to get a centimeter or so of depth in the trays. Additionally, a pair of tongs or rubber gloves will need to be used for shuffling the film about in the tray and moving it from one to the other. Some photographers wouldn’t touch tray processing for anything and others wouldn’t dream of doing anything else. It can be pretty daunting to start with tray processing and the need for a darkroom can turn a great many people off.
Darkroom Film Tank
If trays aren’t to ones liking, a film tank will do. These are basically deep open tanks into which one dips the film after loading it into a specialized hanger sized exactly for a sheet of film. Darkroom tanks require significantly more chemistry than trays but have a smaller footprint and due to the lower surface area they expose the chemistry stays fresh a bit longer than an equal volume in a shallow tray-great news if you’re running a school darkroom on a shoestring. The hangers keep the individual sheets of film from touching and run a dollar or two a piece on the second hand market.
Daylight Film Tank
Particularly dexterous photographers can process as many as 10 sheets of film in trays at once without any issues, other folks struggle with scratches from a single sheet. Just as one can process 36 exposures of 35mm film at once in full daylight provided it’s been loaded in the dark, so can one processes a number of sheets of 4×5 in a daylight cut film tank. There are a number of vintage and modern options when it comes to these sorts of tanks and they run the gamut as far as quality and cost goes.
Downsides to daylight cut film tanks abound. The vintage ones are inexpensive but leak like nothing else and may be rather incomplete. They require a heroic volume of chemistry, many take 2 liters or more. New systems, such as the Combiplan, tend to cost a ridiculous amount for what they are but don’t leak and use far less chemistry. All of these will be a struggle for anyone working in even the largest changing bags. Still the old tanks from Yankee hold 10 sheets and only run $20.00 or so second hand, just don’t make the mistake of shaking them all around like one would do with a 35mm tank.
Daylight Print Drum
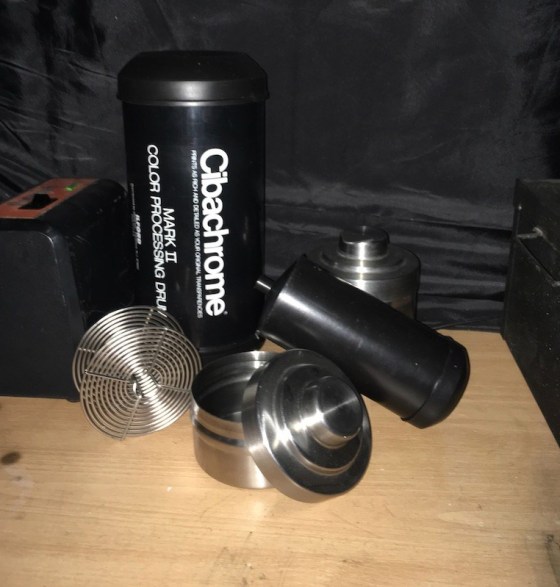
Ostensibly made for processing prints, daylight print drums are available in a range of sizes, including 4×5. The small black tube in the photo above from Ilford Cibachrome is only a bit larger than an empty roll of toilet tissue and can handle one sheet of film at a time. Larger drums can handle multiple sheets and different brands have different takes on the internals with channels and grooves to keep multiple sheets from overlapping or knocking around. As new old stock one can expect to pay $10.00 or so (including pack and post). Daylight print drums use very little chemistry, are inexpensive, and can be quite convenient provided one doesn’t need to process a couple dozen films in an hour.
At their most basic processing drums of this sort are a hollow tube with a light-tight drain on on side and a light tight funnel and cup combo on the other. Hold the drum vertical and pour the chemistry in to the funnel where it gets caught in the internal cup. Tilt it onto it’s side and roll it back and forth on a table to start processing, or spring for a motor base that will rotate it at the push of a button. A couple hardware store casters screwed to a scrap of wood will do for a manual roller base if space is tight. Flip it on it’s end to drain the chemistry and move on to the next step.
Daylight Cut Film Drums and Tanks
There’s a whole range of brands out there that can handle cut films. Some of them work more like the 35mm daylight film tanks that look and work pretty much like a cocktail shaker and others look more like a daylight print drum. They are all hopeless overpriced for anyone who doesn’t just want to dip a toe in and test the water. Get ready to shell out $300.00 or so just for a Jobo tank (never mind the film insert) or any of a dozen exotic film holders that will fit in a standard three reel 35mm film tank.
The Jobo’s are a breeze to load up and use while most of the insanity that they call 4×5 “reels” are variations on the trials of Hercules, hard enough in the light and true madness in the dark. They require a motor base in most cases or a bit more thought out placement of casters for manual rolling because of their more complex construction-the chemistry might not be evenly distributed if it’s just rolled on a table.
Daylight Roll Film Tanks
Grab a plastic two reel Paterson super system 4 and search the web for “4×5 taco method”. It’s easy, it works, it’s affordable, and if one picks up two multi-format plastic reels with it one can process their own 35mm and 120 roll film too. This is the way to go for anyone who isn’t adventurous enough for trays and is to wary (or just unlucky) on the second hand market. Anyone lucky enough to have an area photography store can pick up the gear for this new in store while everyone else can support the few stores still out there by buying it new from a website and having it shipped.
Conclusion
There is an option out there for anyone who needs one. The goal here is just to get one print so the daylight print drum is the way to go, no darkroom required and it’s small enough to fit with room to spare even in a small changing bag.
Don’t get discouraged if you were hoping to see me flub an attempt at tray processing! I just hung a few black sheets around my basement utility sink and I’ll be flailing around in there as well!

Pingback: Large Format Photomicrography part: VII | vade mecum microscope