The terrible thing about an occupation is it’s tendency to occupy; leaving so little time for avocation. -K
One may notice that there are all manner of microscopes on offer, in seemingly endless arrangements. Over time the form of the microscope stand has changed dramatically. For evidence of this one need only browse through the various introductory texts that have been used over the years. Such texts nearly always include a diagram of the microscope and the path of light through the optical components of the same. As much as the diagrams have changed, it never more dramatic than when electric illumination became commonly built into the base of the stand.
For the task today one may divide all microscopes into two very broad groups, those with permanent pre-aligned illumination and those without. In nearly all cases this will mean referring to a stand having an integral lamp such as the AO One-Sixty seen on the right below, or one with a mirror for reflecting the light from an external source into the optical axis as on the AO (Series 2?) seen on the left. In the AO One-Sixty, alignment is taken care of by the manufacturer. One will never need to perform any alignment at all unless of course one suspects something has gone amiss, but more about that another time.

External on the left, internal on the right.
For now we are concerned only with stands having external illumination; those with a mirror. With few notable exceptions the microscope will undoubtedly have a round mirror with two reflective surfaces, one concave and one flat. On the AO (series 2?) the mirror is mounted directly below the fixed condenser. On more traditional stands the mirror is apt to be mounted on a horizontal post that extends under the stage. This post may be mounted horizontally from the vertical portion of the foot which extends beneath the stage, or on an intermediate vertical post which allows for lateral movement; as seen below on this 1940 Bausch & Lomb students microscope.
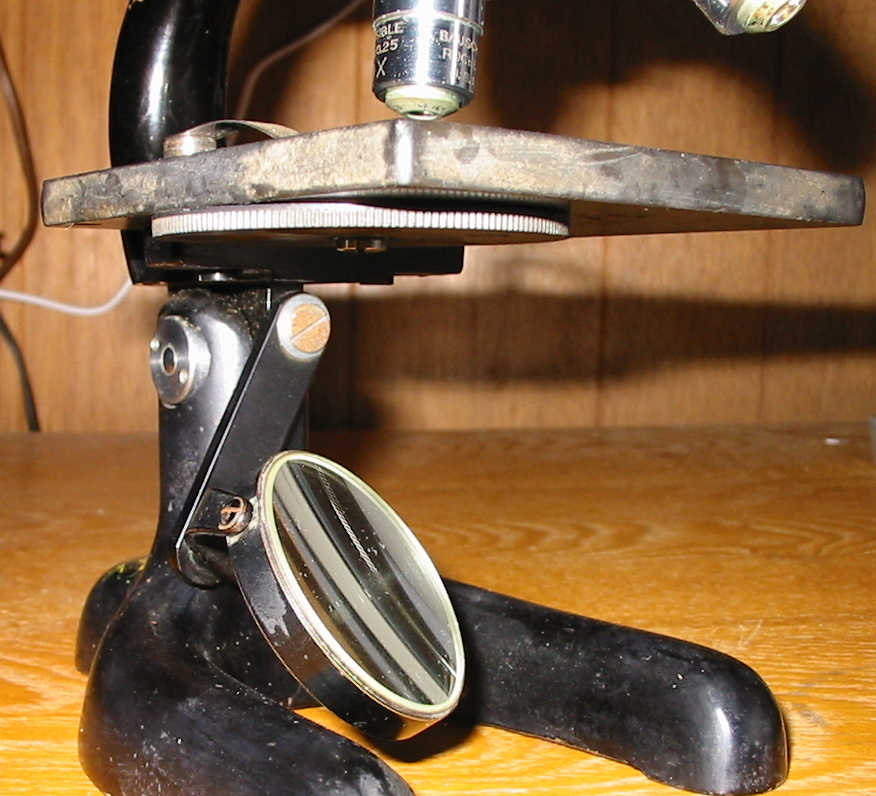
Swing arm mirror mount
There are specialized apparatus and methods of illumination intended for achieving proper alignment of the microscope. Such methods may be time consuming and impractical, particularly when one is unable to leave the microscope set up indefinitely for use when needed. Practical alignment may be thought of as rapid or “quick and dirty” alignment and although imperfect (hardly suited for exacting and critical work) ensures visual accuracy and greatly reduces optical strain.
No special apparatus is required apart from a prepared slide of a stained smear or cross section of uniform thickness. The process takes advantage of the changes observed while working through a range of focus, so it is important to use a slide with an object of uniform thickness. One may employ an ocular of any power and all but the lowest (48-24mm) powered objectives. It is recommended to begin with a 10x ocular and 16mm objective.
Prepare for the process by first setting up the external light source and positioning the mirror to direct a beam of light through the objective and into the eyepiece. If one does not have a condenser and has the option to use a flat or convex mirror, select the flat mirror for use with any objective of more than 4mm (43X and below in general practice).
The Process (with a condenser or concave mirror)
- Position the prepared slide upon the stage and bring the objective into focus with the coarse adjustment knob.
- Looking through the ocular work the fine adjustment through focus so that one can observe both the lowest range of focus and the highest.
- Notice that one small area comes into focus first as one focuses down, and leaves focus first when focusing back up. That area is the location where the light from the condenser is converging.
- Adjust the position of the mirror so that the location where light from the condenser is converging is in the center of the field of view. When the area is in the center the illumination is aligned or axial.
The Process (without condenser or concave mirror)
- Position the prepared slide upon the stage and bring the objective into focus with the coarse adjustment knob.
- Looking through the ocular work the fine adjustment through focus so that one can observe both the lowest range of focus and the highest.
- Notice that focus tends to progress from one area of the field of view to the next in a wave. Without an optical surface converging the light (as a concave mirror or condenser would) alignment is reliant on parallel rays of light.
- Adjust the position of the mirror so that the center of the wave of focus appears as a ripple extending from the center of the field of view (caused by spherical aberration in the objective) rather than a wave from one side to the other.
The process may seem tedious at first but skill is rapidly acquired. If the concept seems unclear sketching out the rays of light on a sheet of paper quickly explains the variation caused by improper alignment and is quite straight forward.
